Add a Waitlist Form in your Web App with Google Sheets and Javascript
Here's a step-by-step guide on how add a "Join waitlist" form on your website for free.
To my dear readers. Today, I am taking a brief break from writing about AI to share something a bit different with you all.
As I am currently building a new software product called GetShipped, I just finished implementing a waitlist feature to collect emails from people interested in the product.
The waitlist form was easy and completely free to code, so I thought it was worth sharing with my followers who might find this topic helpful.
Before diving into the technical details of the implementation, I’d like to introduce the concept of GetShipped.
What is GetShipped?
My ultimate goal for GetShipped is to offer the best boilerplates for your next AI web app. It’s packed with fundamental features like a database, payment systems, a beautiful landing page, and AI capabilities (text-to-text and text-to-image).

FYI. This is still under development and some sections of the landing page are not finalized yet.
The beta will launch in a few weeks, and I hope to get your support for this project. The rest of the article will guide you on how I implemented the “Join Waitlist” form using Google Sheets and a few lines of JavaScript code.
Let’s get started.
Step #1: Create a NextJS 14 project
First, create a folder on your local machine and open a terminal. Execute the following command to generate a Next.js web application:
npx create-next-app@latest waitlistBuild and run the app with npm run dev . The default app would look something like this:

Open the page.tsx file and replace its content with the following:
"use client"
import JoinWaitlist from './components/JoinWaitlist';

export default function Home() {
  return (
    <div className='p-10'>
        <JoinWaitlist />
    </div>
  );
}
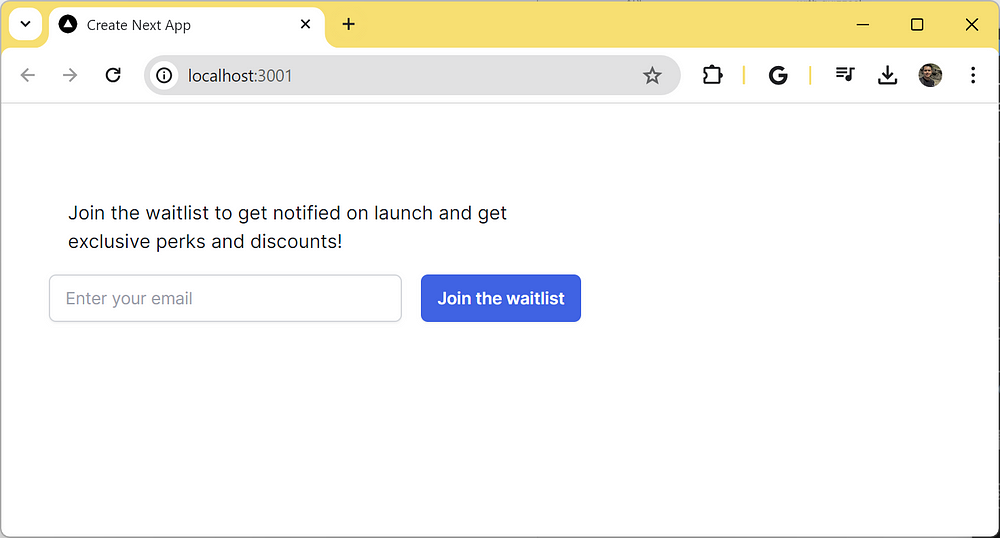
The page should now look like this:

Step #2: Set Up a Google Sheets
Create an empty Google Sheet and name it something like “GetShippedWaitlist”.

Next, select the “Apps Script” option under the Extensions tab.
Keep reading with a 7-day free trial
Subscribe to Generative AI Publication to keep reading this post and get 7 days of free access to the full post archives.

