AI Anime Prompt Not Working? How to Fix It in PixAI
Learn why anime generators ignore details, change character features, or miss the look you described, then fix those problems using better models.

Despite the advancements and power of today’s image models, there are still days when I get contextually incorrect results. For example, I asked for an anime girl with short silver hair, green eyes, and a red scarf. The model gave her long brown hair and removed the scarf instead. I added more details, generated again, and somehow ended up further from the character I had in mind.
Yeah, I know. It happens a lot, and it is annoying.
A prompt can be clear to us while leaving plenty of room for the model to interpret. The selected model may favor certain faces or hairstyles, a LoRA may overpower the description, or text alone may not be enough to preserve a specific character.
Instead of endlessly rewriting the same prompt, I tested each possible cause in PixAI. I simplified the description, compared models, adjusted the LoRA weight, added a reference image, and edited individual details.
What I found is that a failed generation does not always require a better prompt. Sometimes the prompt is already fine. The problem is somewhere else in the workflow.
Common Prompt Problems in AI Anime Art
Prompt failures are not always dramatic.
Sometimes the image is technically good, but it does not match the prompt. Hair colors change, accessories disappear, outfits get redesigned, and faces look different with every generation.
For my first test, I used this prompt in PixAI:
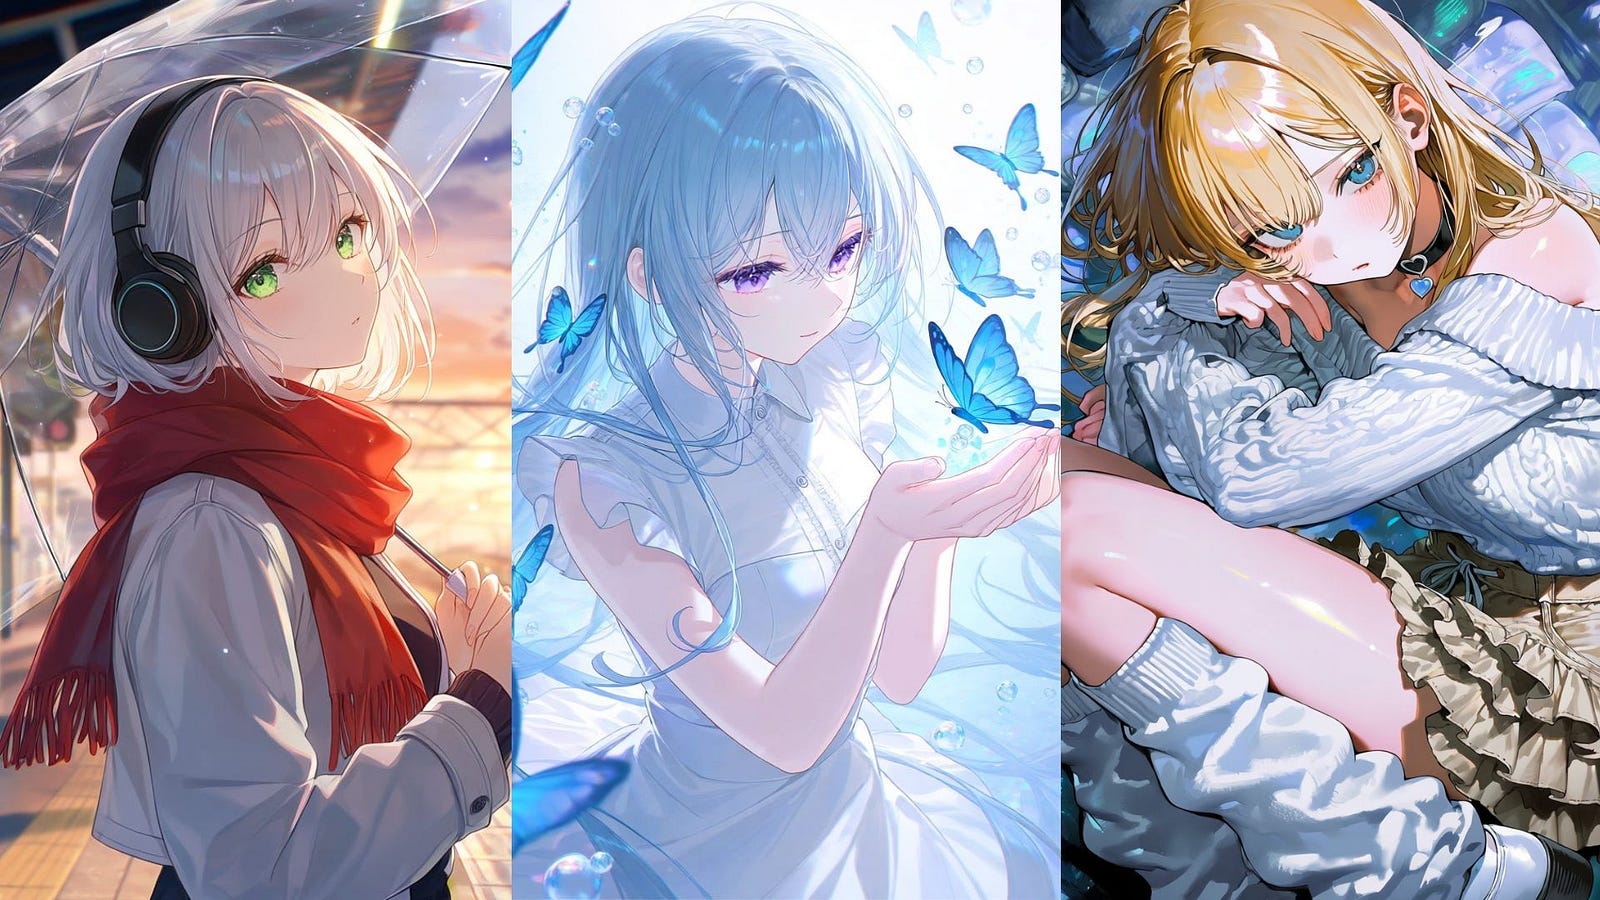
Prompt: Anime girl standing on a train platform at sunset, short silver hair, green eyes, white jacket, red scarf, black headphones, carrying a transparent umbrella, she’s in a train platform, cinematic lighting, detailed anime illustration

The result looked good. The warm lighting, character design, and overall anime style were close to what I had in mind.
But PixAI also added a train in the background, even though I never asked for one.
I only mentioned that the character was standing on a train platform. The model apparently connected the location with the object most commonly associated with it and decided that a train should be part of the scene.
It was not a terrible addition. In fact, the train made the background feel more active and helped sell the location. But it still showed that the model was interpreting the prompt rather than following it literally.
This is one reason an image can look contextually correct while still including details that were never requested. AI models rely on visual associations, so words such as “train platform” can bring in trains, railway tracks, signs, crowds, or other elements that usually appear in similar scenes.
That may be helpful when I want the model to fill in the environment creatively. It becomes a problem when I need tighter control over the composition.
Why Adding More Words Does Not Always Fix the Prompt
My first instinct was to make the prompt more specific.
Since PixAI added a train that I never requested, I added “no train in the background” to the description:
Prompt: 1girl, short silver bob haircut, green eyes, red scarf, black headphones, white cropped jacket, holding a transparent umbrella, empty train platform, no train in the background, sunset, anime illustration

This time, the output was closer to the composition I had in mind. The character was still standing on a train platform, but the model no longer treated a train as a required part of the scene.
The change looks simple, but it shows how AI image models fill in details based on visual associations. Mentioning a train platform can be enough for the model to add a train, even when the prompt never asks for one. Adding “empty train platform” and “no train in the background” gave it a clearer boundary.
Still, this does not mean adding more words is always the answer.
A longer prompt can introduce even more objects, styles, and instructions for the model to balance. If I keep adding descriptions every time something goes wrong, the prompt eventually becomes harder to control.
The more useful approach is to be specific about the actual problem. In this case, I did not need to rewrite the character, lighting, or setting. I only needed to tell the model which unwanted object to leave out.
PixAI also supports negative prompts, so I could place terms such as train, passing train, locomotive, and railway vehicle there instead of relying only on “no train” in the main prompt. Negative prompts are especially useful when the same unwanted object keeps appearing across several generations. PixAI explains these features in its complete beginner guide.
This worked better than filling the prompt with extra scene details. I kept the parts I already liked and corrected the one assumption the model had made on its own.
How Model Choice Changes Prompt Accuracy
When a revised prompt still does not work, the model may be the problem. One anime model may favor soft portraits, while another leans toward saturated colors or dynamic poses. These tendencies affect how each one interprets the same words.
To test this, I used the shorter silver-haired character prompt with two PixAI models. I kept the prompt, aspect ratio, seed, and other settings as consistent as possible.
Both models understood the idea, but the results were different. Tsubaki.2 followed more small character details in my test, while Hinata V2 gave the scene stronger color and energy. I preferred Tsubaki.2 here because accuracy was my priority, although the other image was more eye-catching. I can easily imagine choosing Hinata V2 for a poster or action scene instead.
If the same feature keeps failing, another PixAI model can reveal whether the wording or model is responsible. The PixAI model and LoRA guide explain how these parts work together.
How LoRA Weight and Trigger Words Affect the Result
A base model controls the overall image, while a LoRA pushes it toward a character, outfit, pose, or style. That influence can improve accuracy, but it can also create conflict.
Some LoRAs require trigger words. If one is missing, the intended effect may appear weakly or not at all. Too little weight can make a LoRA barely visible, while too much can overpower the prompt or distort the image.

I tested one character LoRA with the same prompt at three weights: 0.4, 0.8, and 1.2.
Common prompt: Medium shot of a serene anime girl with long light blue hair and purple eyes, standing gracefully in a dreamlike ethereal environment, gently holding a glowing blue butterfly in her cupped hands at chest level while gazing at it with a soft, tender expression. She wears a pristine white collared sleeveless outfit with subtle fabric sheen and intricate stitching details. Surrounding her, numerous translucent blue butterflies ascend upwards in swirling patterns, interspersed with delicate floating bubbles that catch prismatic light refractions. The background fades into infinite soft gradients of blue and white
All three results were already good enough to use. At 0.4, the image looked great, although the colors were slightly washed out. The 0.8 version went much harder on the color and looked overly saturated to me, but it was still a very good result. At 1.2, the colors landed somewhere between the first two, and that balance worked best for me.
I would be happy with any of them depending on the look I wanted. This comparison also shows why there is no single best LoRA weight. Which of the three do you prefer?
A Practical PixAI Troubleshooting Workflow
Random regeneration can burn through credits without showing why the prompt failed. I got better results once I treated each generation as a small test.
I start with the character and three or four essential details. After the first output, I identify one specific failure.
I then change one variable. I simplify the prompt before testing another model with the same seed and settings. For a LoRA, I check its trigger words, compatibility, and weight. For character identity or composition, I add a reference. This sounds slower than changing everything at once, but it usually saves generations because I can see which adjustment actually helped.
In one test, the character, lighting, and background were already close to what I wanted, but the red cap was missing. I opened the image in PixAI’s editing workflow and used this instruction:
Prompt: Add a plain red cap on her head. Keep her face, hair, jacket, pose, lighting, and background unchanged.
This was faster than starting over. The hat was added without replacing the character or composition. I still had to inspect its edges around the hair, but that was easier than another unpredictable generation.

PixAI includes Flow Edit for natural-language changes, Edit Pro for more control, and inpainting for isolated areas. This turns troubleshooting into a workflow instead of a cycle of rewriting and regenerating.
Before and After Results
No single fix solved every problem. The overloaded prompt improved after I removed secondary details. Switching models changed how closely the output followed the character instructions, while adjusting the LoRA helped balance resemblance against image quality.
The reference had the clearest effect on consistency, although smaller features still changed. Editing worked better when only one part of a good image needed correction.
The biggest improvement came from isolating the problem. Some failures were caused by wording. Others only improved after I changed the model, adjusted the LoRA, or added a reference.
PixAI made the comparisons easier because its models, LoRAs, references, seeds, and editing tools sit in one platform. Testing still takes several generations and consumes credits, so some trial and error remains.
Prompt Troubleshooting Checklist
Before generating again, I would check the following:
Are the essential character details clear and free from contradictions?
Is the selected model suitable for the intended anime style?
Does the LoRA require a specific trigger word?
Is the LoRA compatible with the chosen base model?
Am I testing only one change at a time?
Would a reference image communicate the idea more clearly?
Can I edit the failed area instead of replacing the entire image?
Final Thoughts
Alright, I just showed you some of the reasons AI anime prompts aren’t working and how to fix them with PixAI. A failed result does not always mean the prompt is badly written. Sometimes the selected model, LoRA settings, or lack of a visual reference is the actual problem.
Based on my tests, the best approach is to change one variable at a time. I got better results by simplifying the prompt, keeping the important character details clear, and using a reference image when text alone was no longer enough. PixAI’s model selection, LoRA controls, reference tools, and editor made this process much easier, although some trial and error was still unavoidable.
What do you think about this troubleshooting approach? If you know other reasons AI prompts might fail, or another method that has worked for you, let me know in the comments.
Hi there! Thanks for making it to the end of this post! If you enjoyed this content and would like to support my work, consider becoming a paid subscriber. Your support means a lot!


