

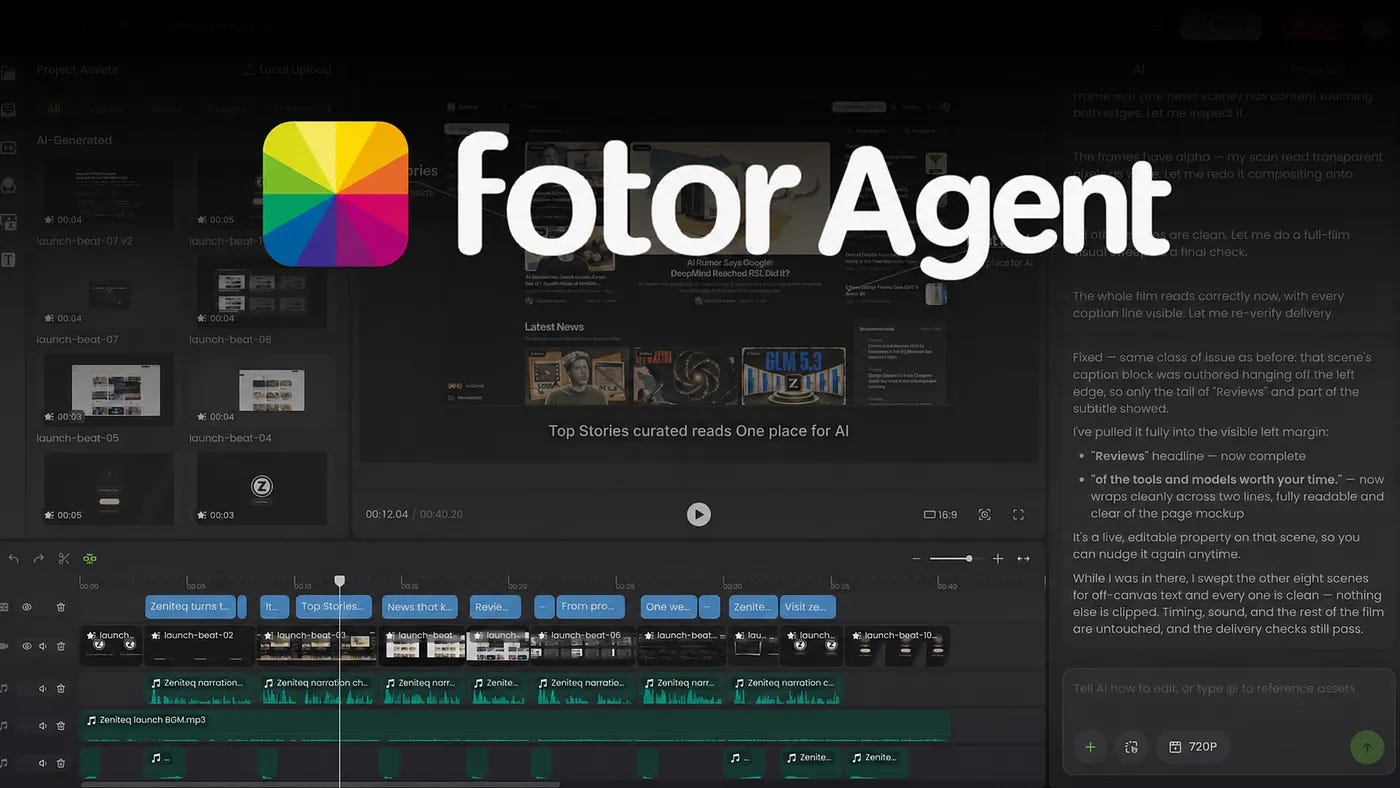
AI video has improved a lot this year. ByteDance’s Seedance 2.5 can create clips up to 30 seconds long with synced audio, and the character consistency is incredibly good. Still, the level of control is at the mercy of your prompting skills.
What if you need to trim a few seconds in between scenes? What if you want to overlay a different audio track? Yeah, sure, just describe it in the prompt and regenerate the entire video. That’s usually how we do it… and it’s incredibly expensive.
The other option is to download the clips and fix them in a separate editor. I’ve done hundreds of video edits over the past three years, and that usually means jumping between apps and spending hours on a video that’s only a minute or two long.
But lately, I’ve been testing Fotor Agent.
It handles script planning, visual and audio generation, motion graphics, and assembly, then gives you an editable timeline to work with. I wanted to see how much of that process it could take off my hands and whether the finished video would be something I’d actually use.
In this guide, I’ll walk you through the project I made, show you the final output, and explain where Fotor’s editing tools fit into the workflow.
Let’s get started.
What is Fotor Agent?
Fotor Agent is an AI tool for creating and editing AI videos and motion graphics through conversation. You can describe your idea or upload reference media, including images, video clips, and audio files, to give it a starting point.
To access it, go to Fotor and open the Agent workspace. You can work with the agent on the script and scenes, review its proposed direction, and continue editing the project after generation.
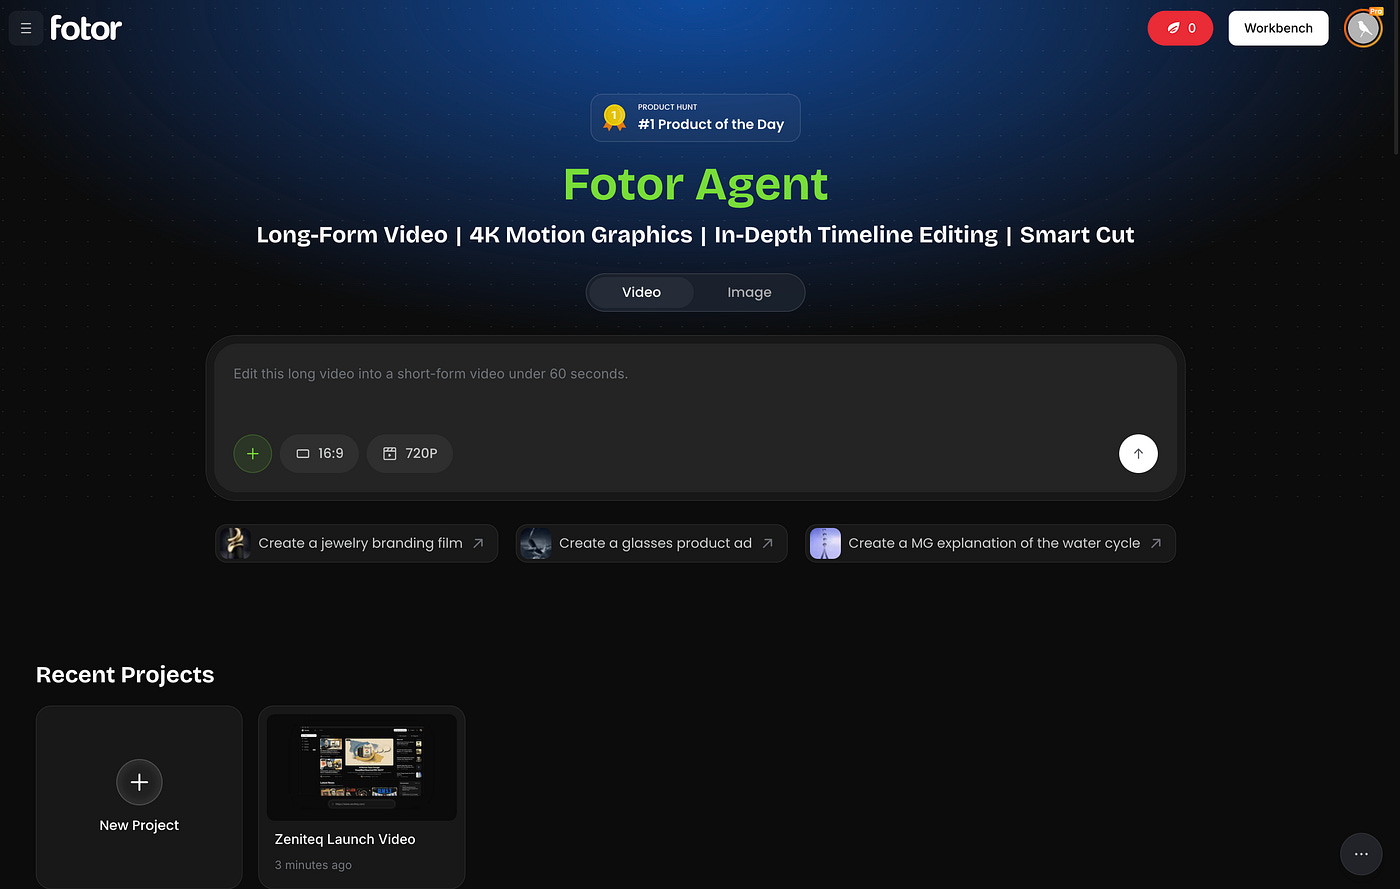
There are four features I want to focus on.
Long-Form Video lets you develop a complete video across multiple scenes, with the agent coordinating the script, visuals, narration, and assembly.
4K Motion Graphics supports animated text, logos, charts, and other graphics that remain editable after generation.
In-Depth Timeline Editing gives you separate tracks for footage, narration, music, captions, and graphics. You can adjust their timing, replace assets, or revise a particular section.
Smart Cut analyzes existing footage to find highlights, remove filler and pauses, and help add relevant B-roll, subtitles, and motion graphics.
I’ve done hundreds of video edits over the past three years and tried a handful of AI video editors and generators.
My usual workflow is to generate assets in one app and stitch them together in another. Trimming clips, adjusting their speed, and making sure everything lines up usually takes me hours!
Fotor Agent says it can handle those steps. That would save me a lot of work, but I wanted to see how it did on a real project of mine before believing the feature list.
Let me show you some examples.
How I made a launch video with my own assets
Before you start generating videos, it’s important to get yourself familiar with the tools and dashboard.
Aside from being able to generate videos through a text prompt, Fotor also offers a bunch of templates and pre-made videos that you can use as inspiration. Just scroll down to explore the available sample projects.
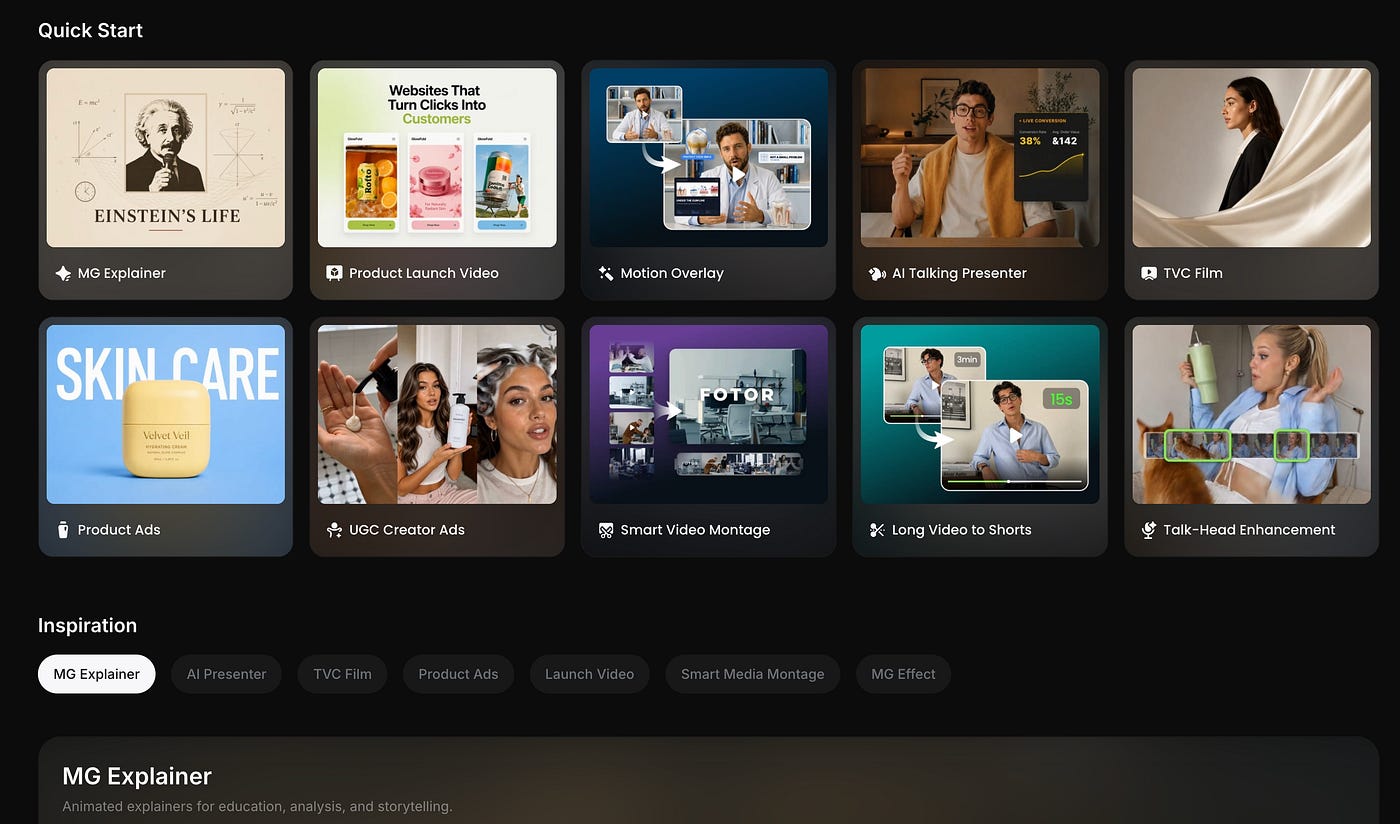
For this example, I’ll create an explainer video for my website, Zeniteq, where we publish AI news, reviews, and tutorials. I want the video to explain what readers can find on the site and introduce our newsletter.
I uploaded the Zeniteq logo plus screenshots of the landing page, newsletter, and About page as reference media. That gave Fotor the site’s actual design to work from, so the video would look like my brand instead of a generic tech promo.
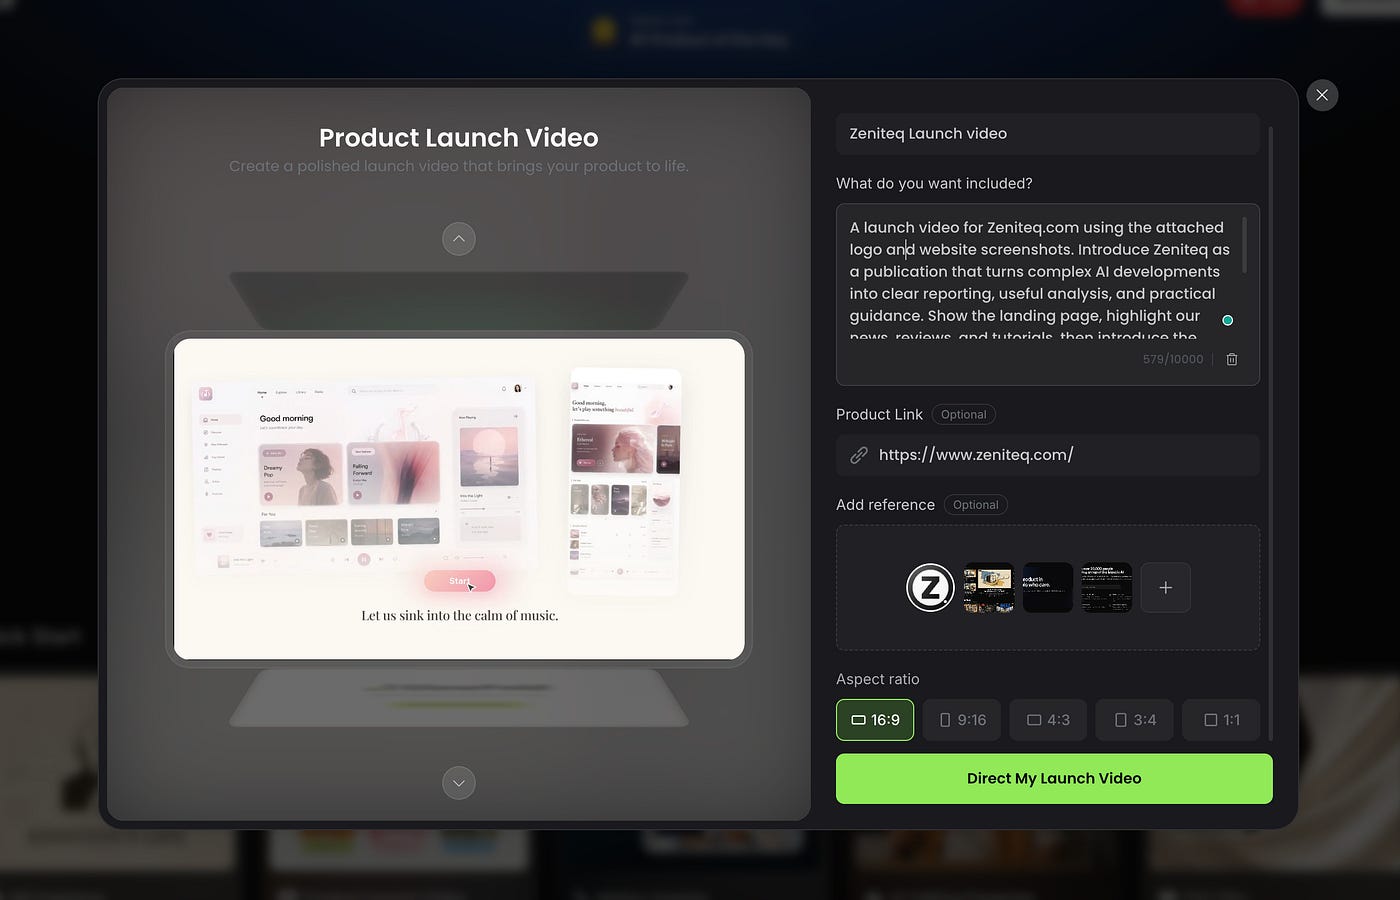
Here’s the prompt I used:
Prompt: A launch video for Zeniteq.com using the attached logo and website screenshots. Introduce Zeniteq as a publication that turns complex AI developments into clear reporting, useful analysis, and practical guidance. Show the landing page, highlight our news, reviews, and tutorials, then introduce the newsletter. Match the website’s colors and typography, preserve the screenshots’ content, and use subtle motion, English narration, and readable captions. End by inviting viewers to visit Zeniteq.com and subscribe. Show me the script and scene outline before generating the video.
The last line of that prompt is the important one.
Before approving anything, I wanted to check that the script explained who Zeniteq is for and what readers can expect from our coverage. I also wanted each screenshot to show up alongside the narration it belonged to. The newsletter page, for example, should appear when the voiceover asks people to subscribe, not two scenes earlier.
You can also set the aspect ratio depending on where the video will be posted, whether that’s a vertical reel or a horizontal YouTube video.
After I clicked “Direct my Launch Video,” Fotor opened a video editor where the agent plans the video. You can watch its reasoning in the panel on the right side of the screen, which is handy if you want to know why it’s making certain choices.
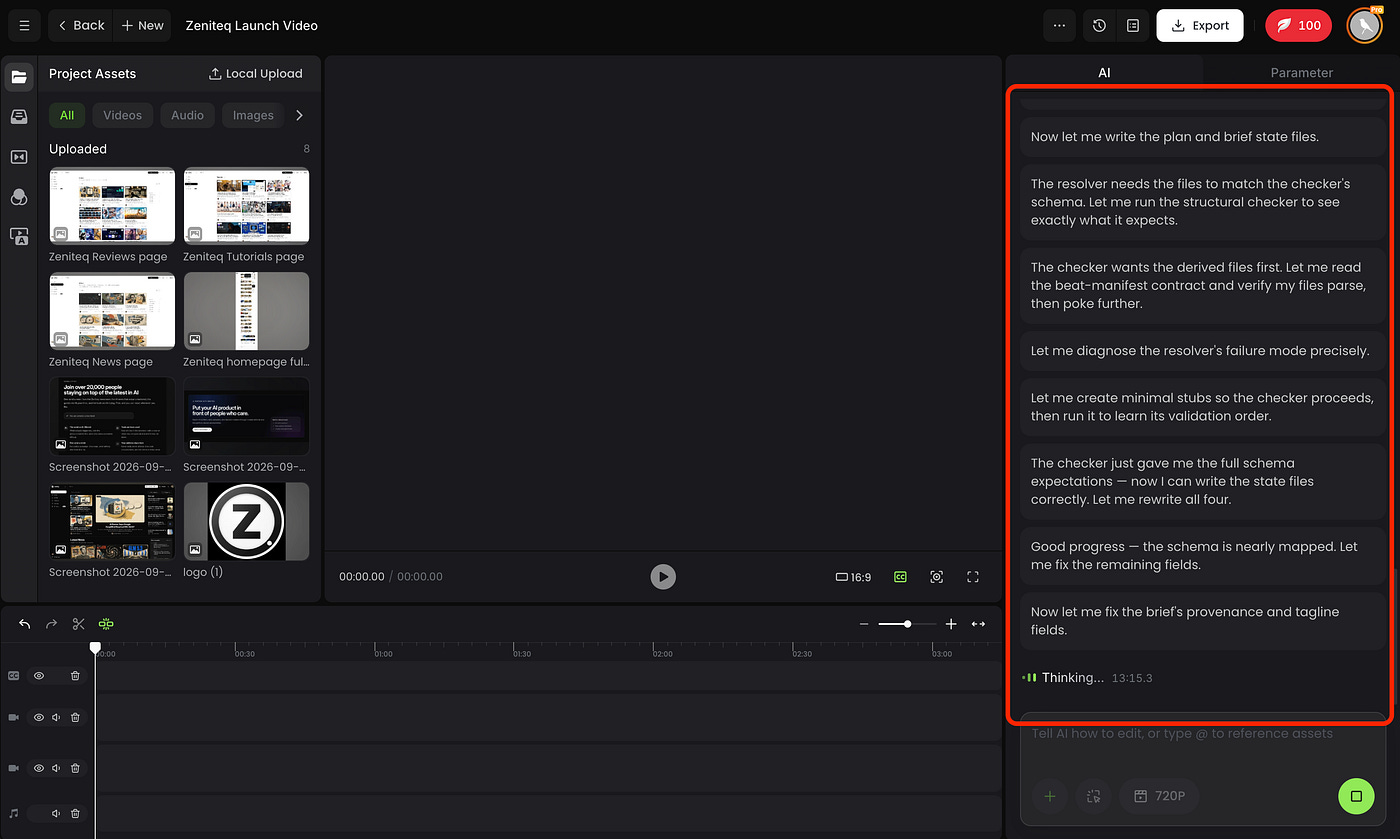
The agent will also ask questions like how long you want the video to be, whether you want to add captions to each scene, and to select your preferred voice actor for the narration. After that, the agent will give you a plan to review and approve.
Here’s the plan it made for a 30-second Zeniteq launch video.
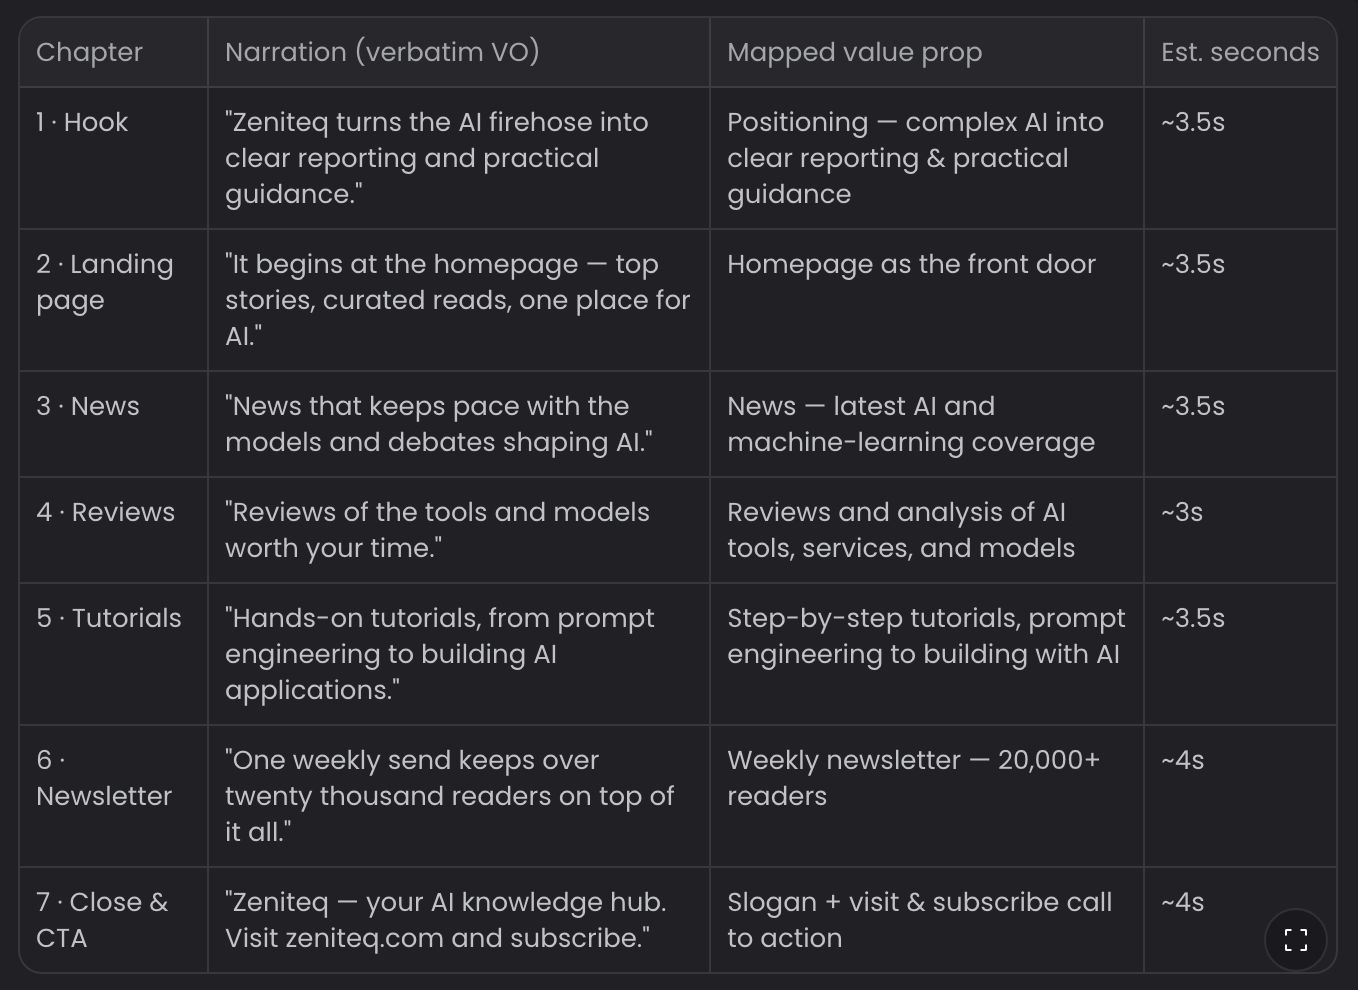
This all looks good to me, so I clicked on the continue button.
Take note that the backend processing is super complex, so the wait could be longer than you expect. There are a lot of moving parts here:
Writing the narrative script and captions
Generating the voice narration and syncing it with scenes
Storyboarding
Generating the images and video clips
These are just some of the important phases that the agent has to process to make sure the output is as good as you expect. Once all processing is finished, the project timeline will automatically be filled.
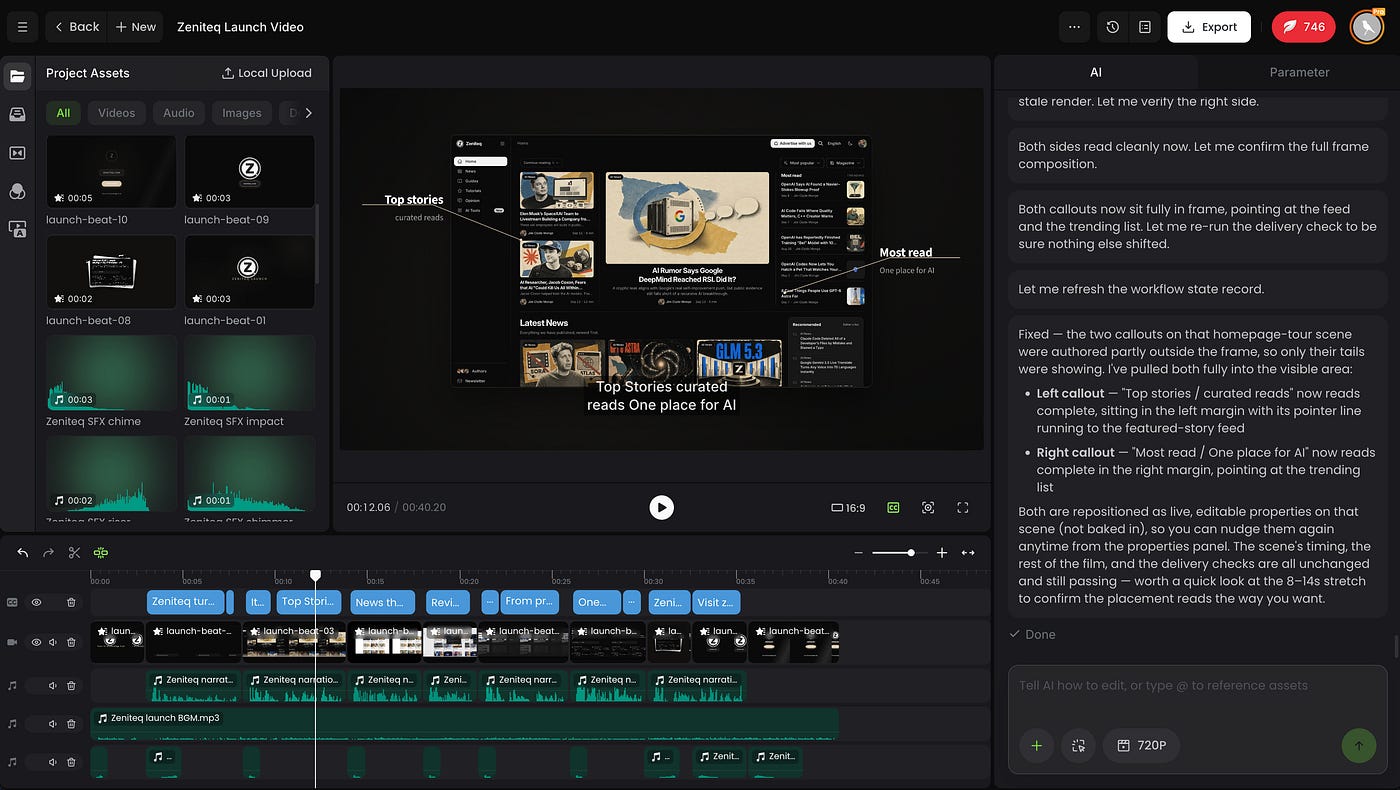
From there, all that’s left is to export the file. You can pick 720p, 1080p, or 4K. Here’s the final video.
I’m really happy with how this turned out.
Fotor put my actual screenshots into the scenes alongside the logo, so viewers see what the site really looks like. The transitions are smooth, and the narration has an upbeat, conversational tone that fits a site intro.
The motion keeps it from feeling like a slideshow of screenshots, which was my main worry going in. And since the newsletter preview shows up right before the closing line, the invitation to subscribe feels like a natural ending.
It wasn’t perfect, though. In one scene, some of the text ran outside the frame, and I had to fix it (more on that in the timeline section).
Making this by hand would have meant prepping the screenshots, animating each scene, recording a voiceover, and syncing it all on a timeline. Letting Fotor do the assembly gave me more time to check the message and fix details before publishing.
Planning a longer video
My example is only 30 seconds, but this is where the Long-Form Video planning comes in. I could ask Fotor to expand the intro into separate sections, show sample articles, and add a walkthrough of the newsletter signup.
For anything longer, I’d review the outline carefully before generating a single scene. When I edit manually, the most annoying thing is realizing halfway through that I need another scene, or that the narration explains something before the footage shows it. Catching that in a written outline is a lot cheaper than catching it after the render, both in time and in credits.
For a tutorial, I’d give Fotor the exact steps and ask it to build the script around them. That way I can check the order before spending credits on scenes. If step three depends on something from step five, I want to see that problem in the outline, not in a finished video.
To be clear, I haven’t tested a long video yet, so the 30-second result is all I can judge here. But approving the sequence before generation is a step I’d keep in any workflow, long or short.
Animated infographics with 4K Motion Graphics
Motion graphics are the animated text, charts, diagrams, and logos you see in explainer videos.
They’re also the part of video work I find most tedious to do by hand. Every label, number, and arrow needs its own keyframes, and changing one stat later often means re-animating the whole shot.
Here’s a motion graphics explainer on how black holes form, made with Fotor Agent:
Pretty cool, right?
This is the kind of video where motion graphics carry most of the explanation. There’s no real footage of a black hole forming, so the whole story has to be told with animated diagrams, labels, and narration that line up with each other.
These graphics aren’t baked into the video. The text, numbers, logos, and charts stay editable on the timeline before you render. In practice, if a label is misspelled or a number needs updating, you edit that one element instead of regenerating the whole scene and hoping the new version looks the same.
To show you an example, select a scene in the timeline that contains an editable element, then just click on it to edit.
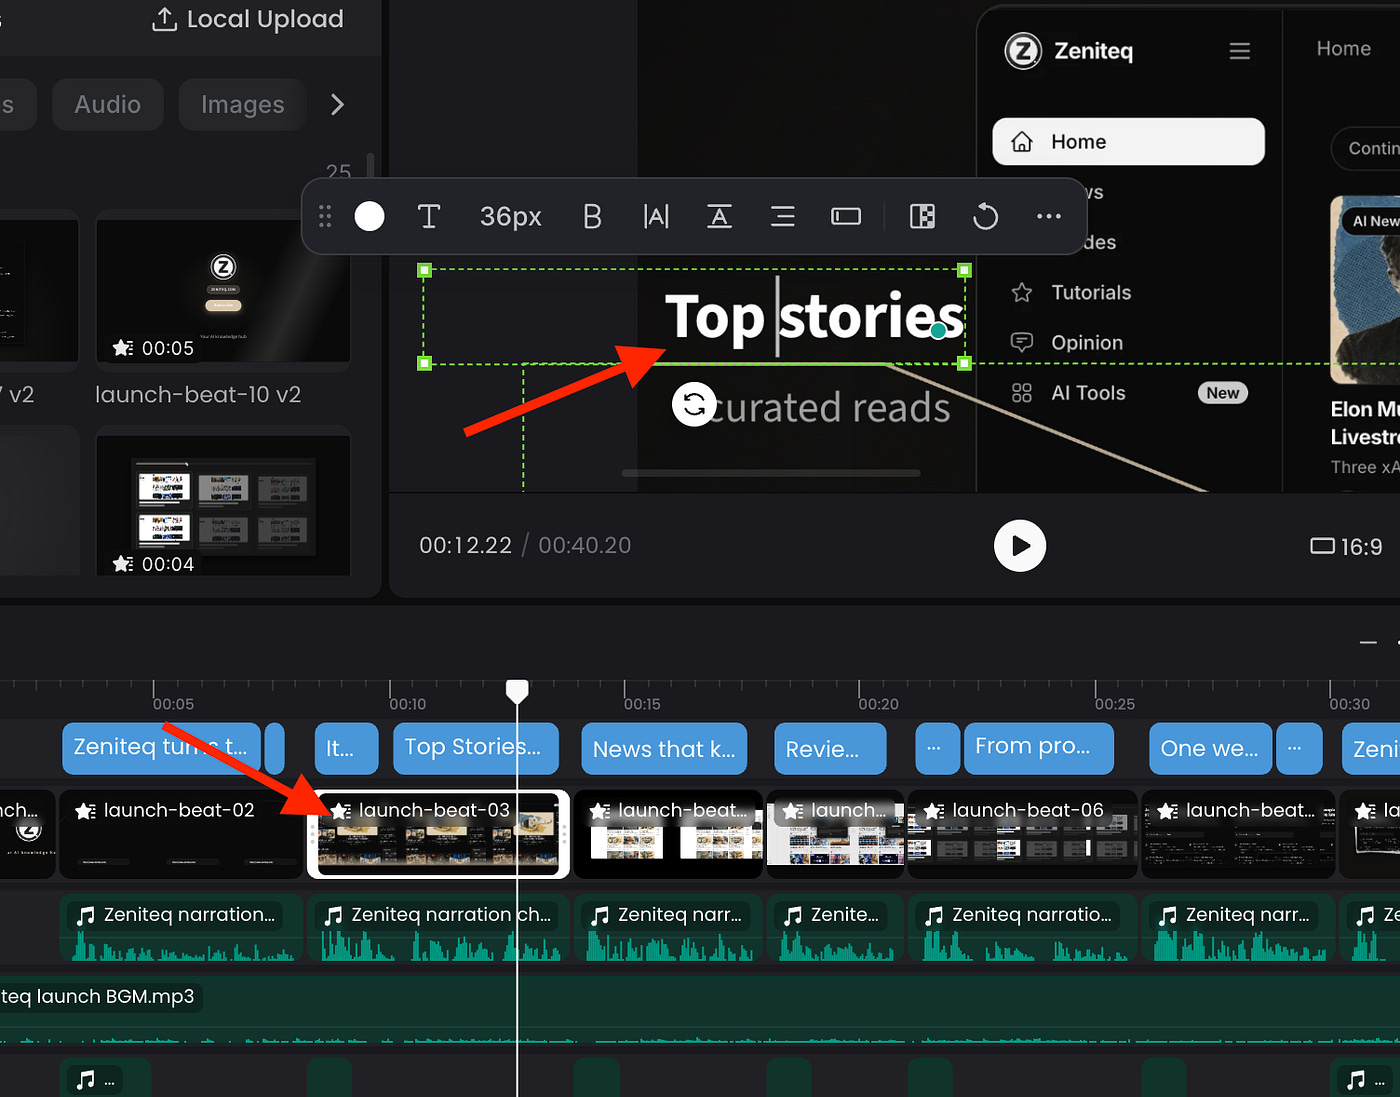
This is incredibly useful so you don’t need to regenerate scenes to make minor fixes. If I’m turning a report into a short animated summary, the numbers are the part most likely to change right before publishing.
Editing the timeline
I spent a few hours with the editing dashboard, and it’s by far the most fascinating aspect of the product. Let me get deeper into it.
Fotor splits the video into separate tracks for footage, narration, music, captions, and graphics, and you can work on each one on its own. You can adjust timing, replace an asset, or revise one particular section.
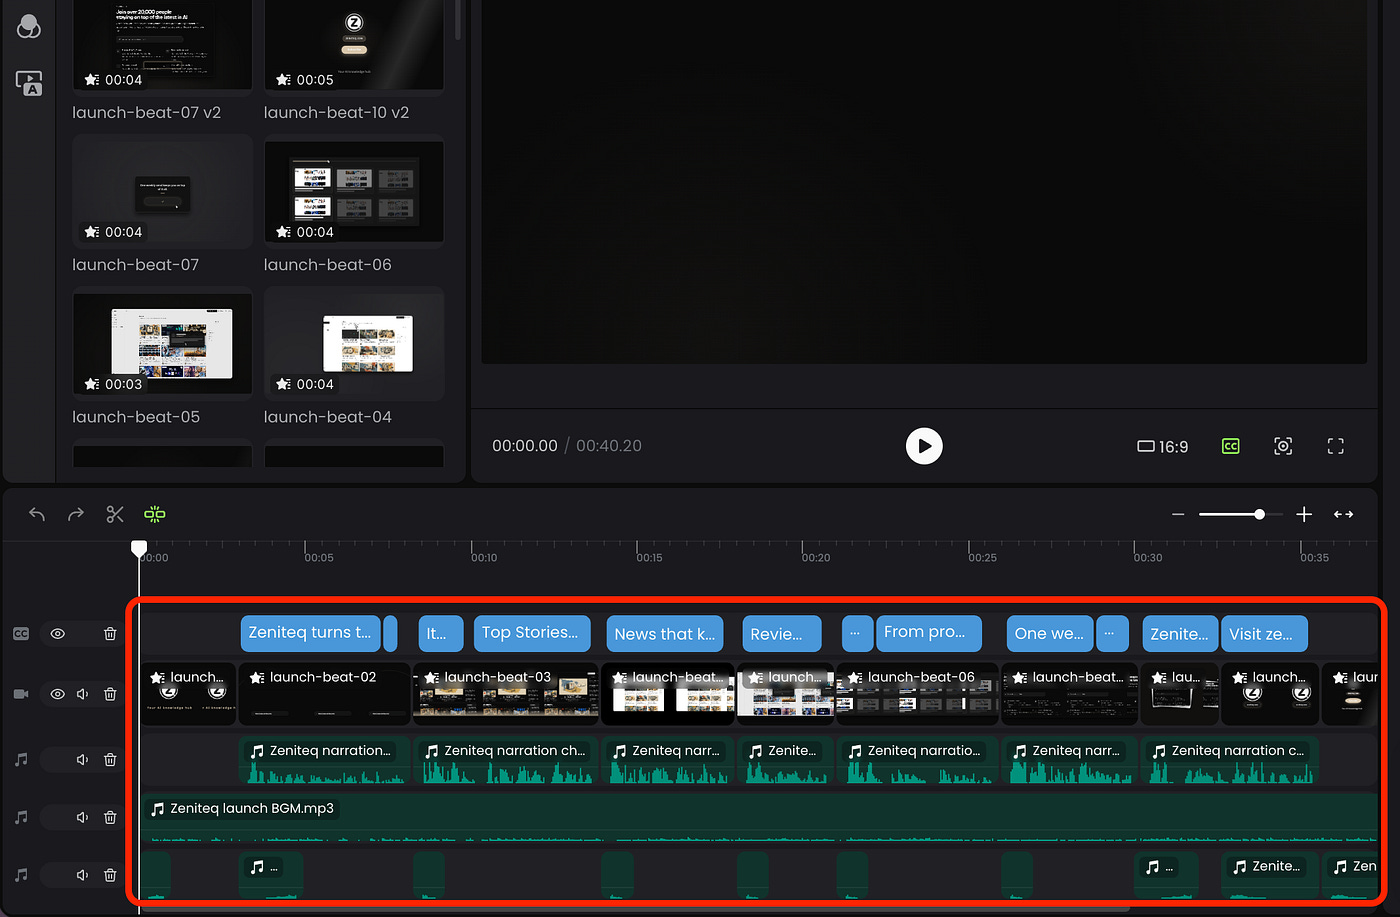
You see, not a lot of advanced AI-powered video generator platforms give you this level of control.
Aside from manually editing the components, you can also edit through chat. That isn’t unique to Fotor, but it works well here because it’s tied to specific scenes.
Remember the text that ran out of bounds earlier? I clicked the scene, hit “Edit with AI” at the top of the screen, and the scene got tagged in the chat automatically. I described the fix, and the agent handled it.
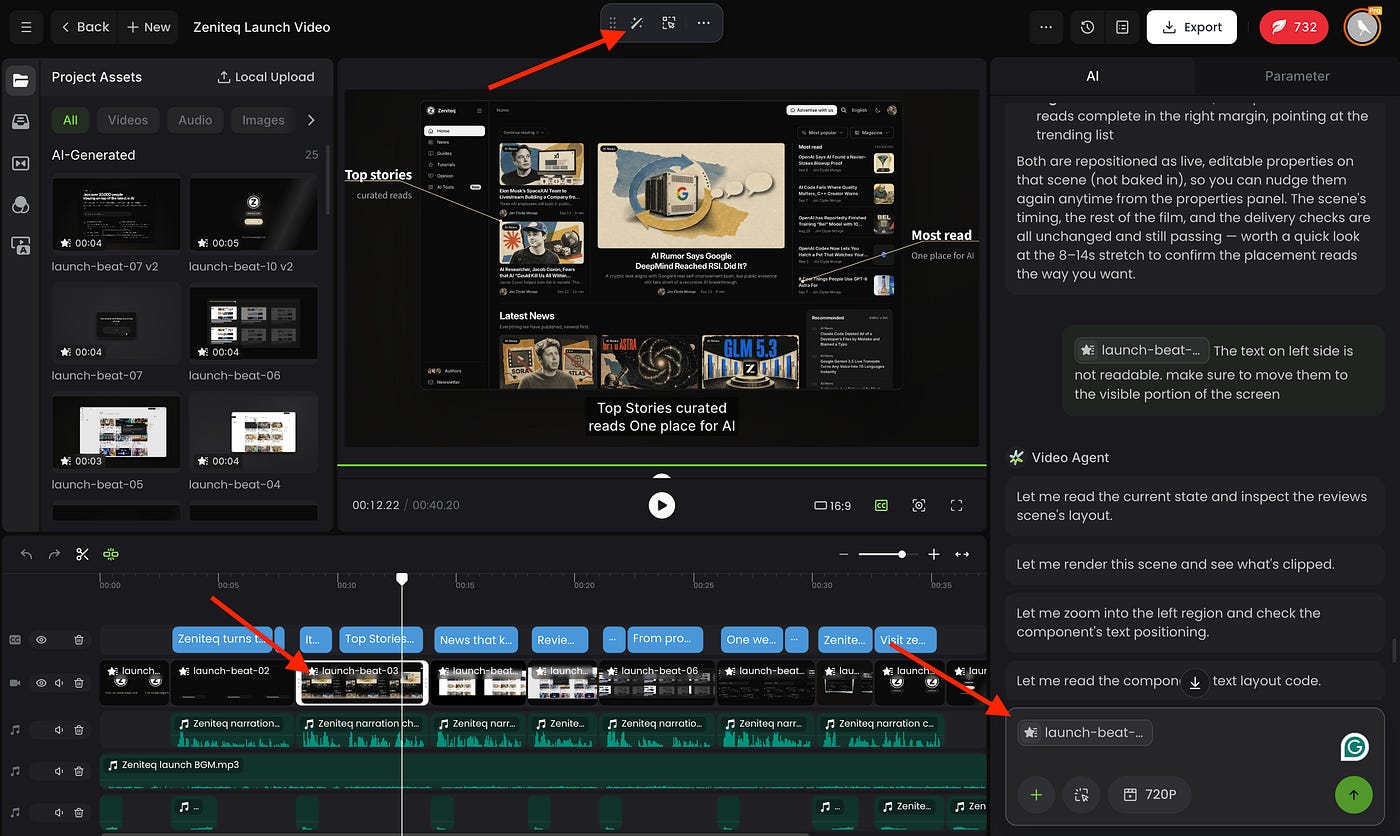
I like having both options. Some fixes are faster to describe (“move the caption up and make it smaller”), and some are faster to just drag into place yourself. Being able to switch between the two without leaving the project is what makes the editor usable for real work.
I didn’t put this project through a long round of revisions, so I can’t promise every complicated change will work on the first try. For what I needed, it took very few edits.
Smart Cut for footage you already have
Everything that I’ve explained so far starts from a prompt and some reference images. Smart Cut works the other way around. You bring footage you’ve already recorded, and Fotor edits it down.
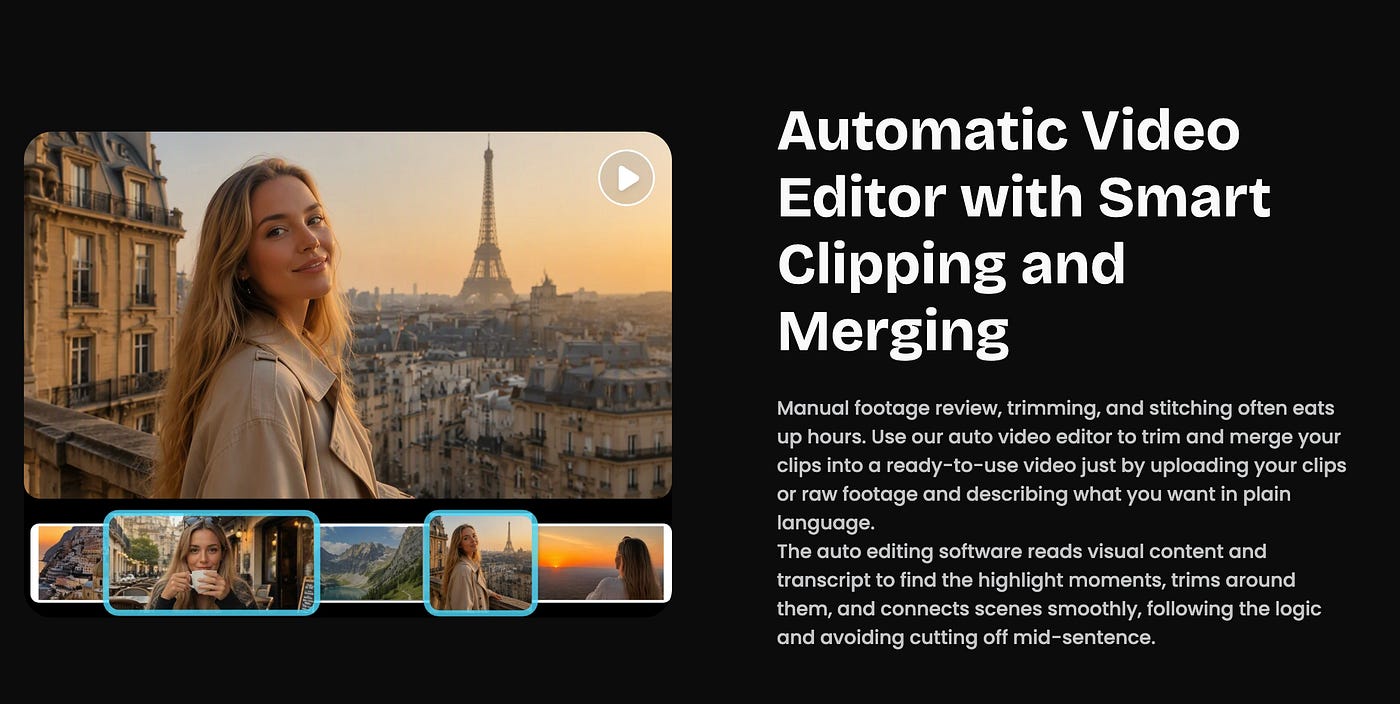
Here’s how it works, according to Fotor:
It cuts silent gaps and filler. Upload a long recording, and it detects the pauses and dead air, pulls out the highlights, and assembles them to a target length. That could be a long YouTube video or a short TikTok cut.
It checks with you before trimming. Fotor says it generates a transcript first and confirms the cuts with you before splitting your sequence. This is the detail I care about most.
It adds the extras. Soundtrack, voiceover, and subtitles can be generated automatically, along with B-roll and motion graphics.
It can revise one segment at a time. You select a clip or segment, describe the change, and the rest of the video stays locked.
Fotor also has presets on the home page for common jobs, like a talking head enhancement preset for UGC-style videos and a media montage preset for turning a folder of clips and photos into one video.
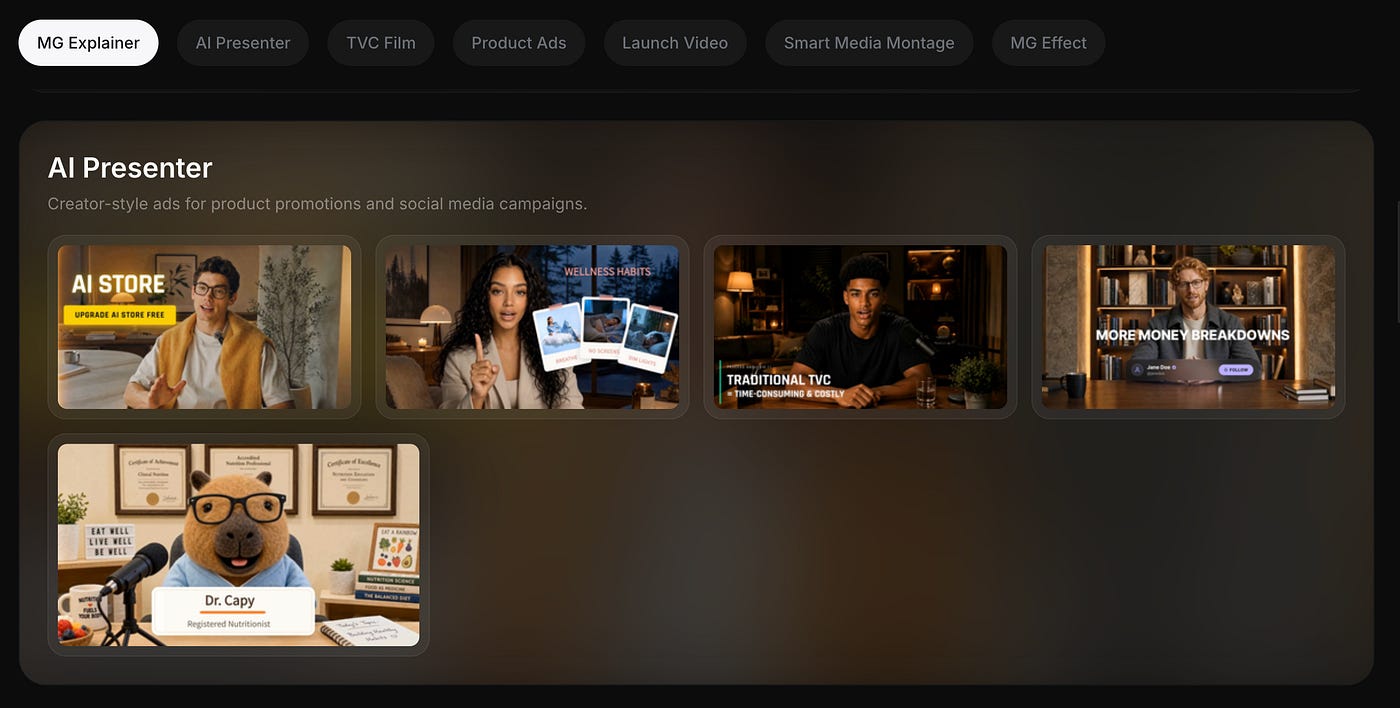
If you record tutorials, podcasts, webinars, or talking-head videos, this is probably the feature to try first. Cutting pauses and “ums” from a screen recording is simple work, but it’s slow, and it’s exactly the kind of task I’d hand off if I can review the result quickly.
Remember to review the final output, though. Some agents tend to do over-cutting. They remove a pause that was there on purpose, like the beat before a punchline or the moment you let a result sink in on screen.
The transcript review step should help with that, but I’d still watch the final cut before publishing.
What makes Fotor Agent different?
I’ve used CapCut for video editing, and I’ve been a fan of having Seedance generation available alongside editing tools. The combo already makes it easier to create footage and bring it into a video.
What felt different with Fotor was how much of the project it prepared after I described the result I wanted.
I’m used to making decisions clip by clip. I generate an asset, bring it into the editor, decide where it belongs, and adjust it around the other footage. With Fotor, I reviewed a proposed sequence, selected the voice and duration, then waited for the agent to assemble the project.
That’s it… Usual work hours cut in half.
Of course, I still make some decisions, but I have something to react to earlier in the process. That suits me when I know the message I want to communicate but haven’t worked out every shot.
I also appreciate being able to request a change to a particular section. When most of a video is already working, I want to concentrate on the part that needs attention.
I’m not ready to say Fotor could replace my usual editor for every job. I’d need to try it on a longer project with several rounds of client feedback first. But the launch video gave me a reason to use it earlier in my workflow, when I’m still figuring out how to turn raw material into a sequence.
Tips for getting better results
A few things made a difference in my own projects:
Upload your real assets. Screenshots, logos, product photos, and recordings give the agent something specific to build around. The less you give it, the more generic the result.
Ask for the script and outline first. Adding “show me the script and scene outline before generating” to the prompt costs nothing and catches ordering problems before you spend credits.
Say which asset goes with which part of the narration. I told it to show the newsletter page during the subscribe invitation. Being that specific saves you from moving things around later.
Ask for readable captions. It sounds obvious, but I still had one scene with text out of bounds. Mention it in the prompt, then check every scene before exporting.
Pick the export resolution based on the content. Graphics-heavy videos benefit from 4K. A quick social clip probably doesn’t need it.
Where I think Fotor works best
Based on this project, I’d first consider Fotor for videos where I already have the content and assets but need help with production. I am thinking of product photographs, website screenshots, recordings, and approved copy to give the agent something specific to build around.
For a small business owner or product team, that could be a launch video or a short explanation of a new feature. You can supply the actual product material, describe the message, and review how the agent presents it.
For tutorial creators and educators, I see a use for the combination of recorded footage, narration, captions, and motion graphics. I could supply the demonstration myself and use the agent to help assemble the explanation around it.
For people presenting reports or research, the animated infographic tools could help turn a few findings into a narrated video. I would bring the source data and the explanation I wanted to make, then review the chart and voiceover together.
For freelancers and small content teams, I can see Fotor helping produce a first version for review. It’s easier to discuss the pacing of a video when everyone can watch a sequence instead of trying to imagine it from a written outline.
A few catches I found while exploring the app:
The question I still want answered is how well it handles feedback over several rounds. Generating the first version saves time, but revisions are a big part of paid video work.
Cost is the other thing to plan around. My 30-second launch video used over 130 credits. The $10 monthly plan gives you 200, so that one video used up most of a month. Add the roughly 30-minute processing time, and it could be a deal breaker if you need to turn videos around fast or produce a lot of them.
I’d factor in both the credits and the wait before moving much of my workflow into Fotor.
The question I’d want answered after a few assignments is how well it handles feedback. Generating the first version saves time, but revisions are a large part of paid video work. I’d count those hours and credits when deciding how much of my workflow to move into Fotor.
Final thoughts
That’s about it. I just explained how Fotor Agent brings video planning, media generation, animated infographics, and editing into a conversational workflow.
You can start with an idea or reference media, develop the sequence through chat, and continue refining the generated project. I had so much fun generating product launch videos and editing images with its built-in tools.
The editable timeline is what I think sets it apart from other similar platforms. It gives creators a way to work toward a production-grade video through revisions. It works well with many use cases like producing a tutorial, a product demonstration, or an animated report.
I’m glad platforms like Fotor are giving creators more accessible ways to turn their ideas into visual content. Thanks to the teams building these tools and making room for users to keep shaping the results after generation.
What do you think about Fotor Agent? Let me know your thoughts in the comments.
Hi there! Thanks for making it to the end of this post! If you enjoyed this content and would like to support my work, consider becoming a paid subscriber. Your support means a lot!