

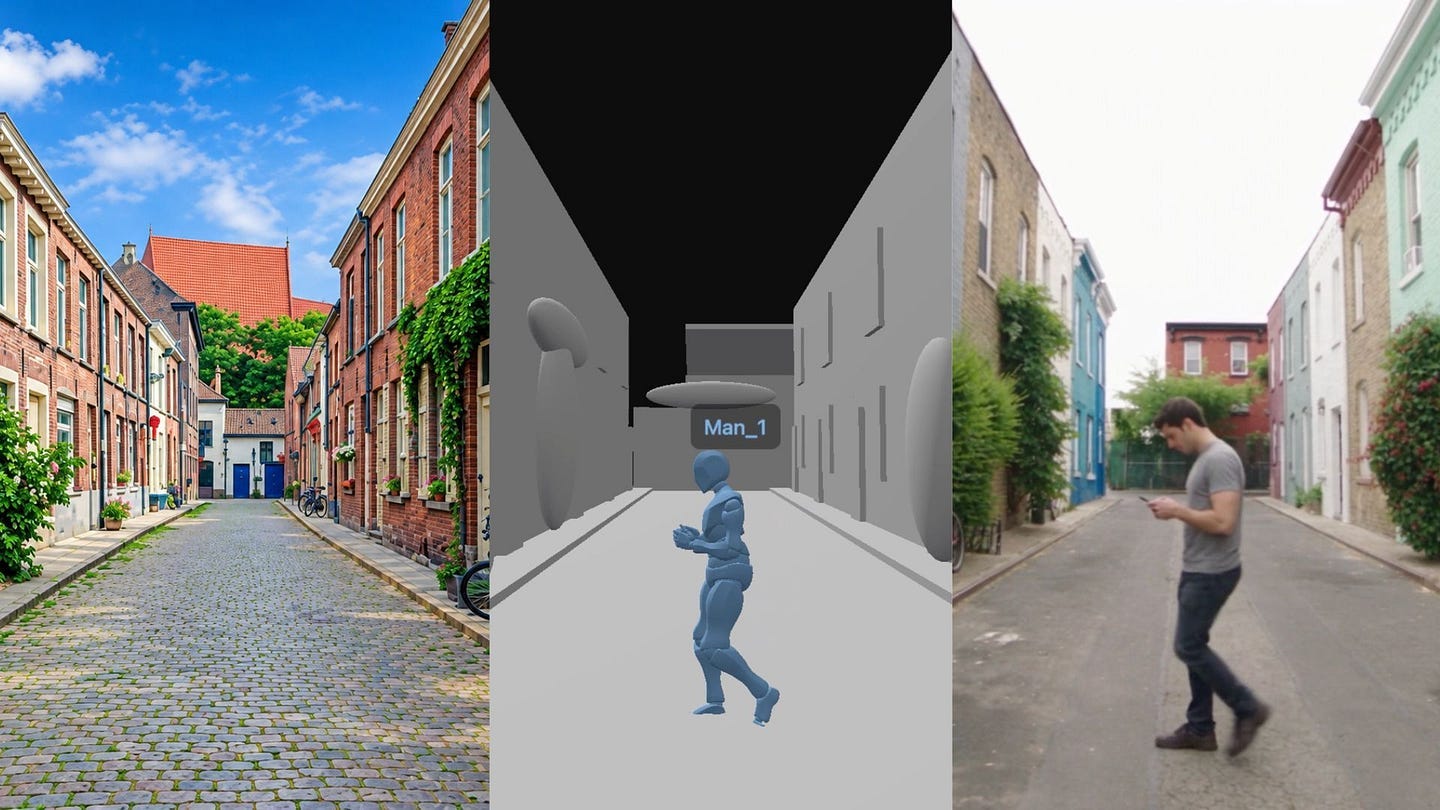
Generating an AI video from text is one thing. Getting the camera, character movement, and scene layout exactly how you imagined them takes a little more work.
You can describe a man walking down a street and get a good-looking result, only to find that the camera faces the wrong direction or the character walks past the wrong buildings.
What do you do? Yeah right, just regenerate it. Another prompt, wasted time, more credits spent trying to fix the shot.
The good thing is, there is now a new workflow to generate AI videos to gain more control over the output.
Topview AI released a new 3D builder tool that lets you build a rough 3D version of any scene first. You can move things around, control the camera, animate the character, and watch the whole shot before asking a video model to generate the final version.
The low-poly animation becomes a reference that shows the model what you mean.
I tried this workflow with GPT-6 Astra, starting with a street photo and ending with a video of a man walking while texting. Astra helped build the 3D scene, and Seedance 2.5 generated the finished video.
In this guide, I’ll walk you through the process so you can try it yourself.
An Overview of the Workflow
Topview’s 3D Builder turns a description or reference image into an editable 3D scene for shot previsualization. That’s a way of saying you can make a rough version of your video and rehearse it before generating the final output.
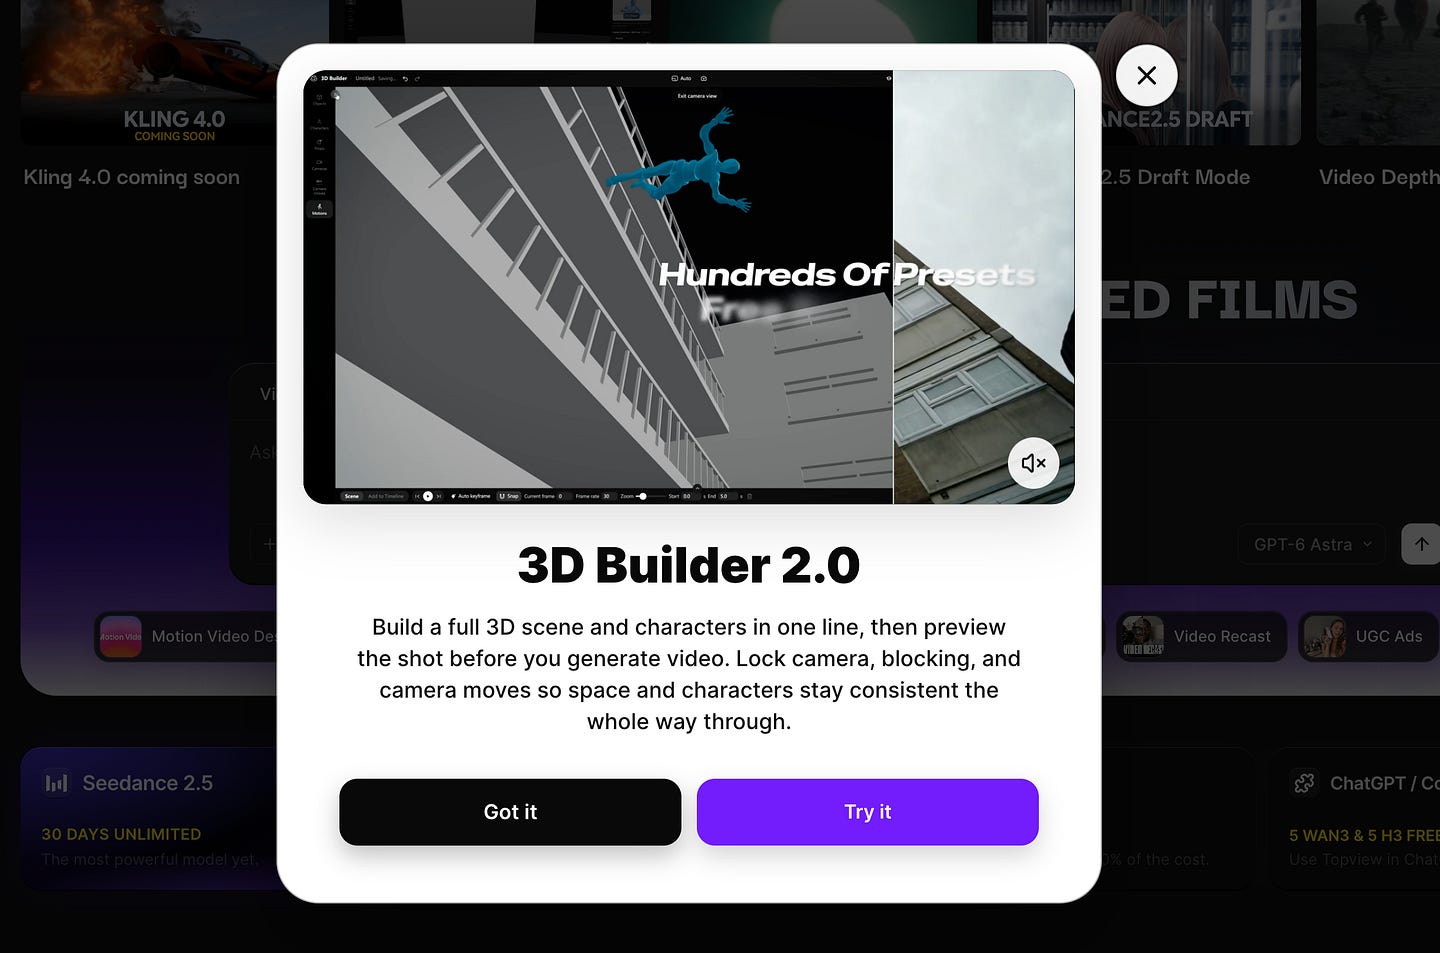
You can start with just one sentence or one image. Once the agent builds the scene, you can adjust the objects, add characters, change the camera angle, and set up an animation.
For this demo, I’ll turn a street photo into a low-poly scene, add a character, and make him walk along the sidewalk while texting. Then I’ll send that animation to Canvas and use it as a reference for the final video.
I need you to focus on the process here and not so much on the quality of the output for each step. The most interesting part of this process is that I am able to fix the scene while I can still move everything myself.
If a tree blocks the character or the camera leaves too much empty space, I can adjust it in the builder. I don’t have to regenerate an entire video to find out whether a different arrangement would look better.
How to Make a Low Poly 3D Scene
First, let’s turn a photo into a 3D scene.
For this example, I wanted a character walking along a quiet street, so I found a sample image online to use as the reference.
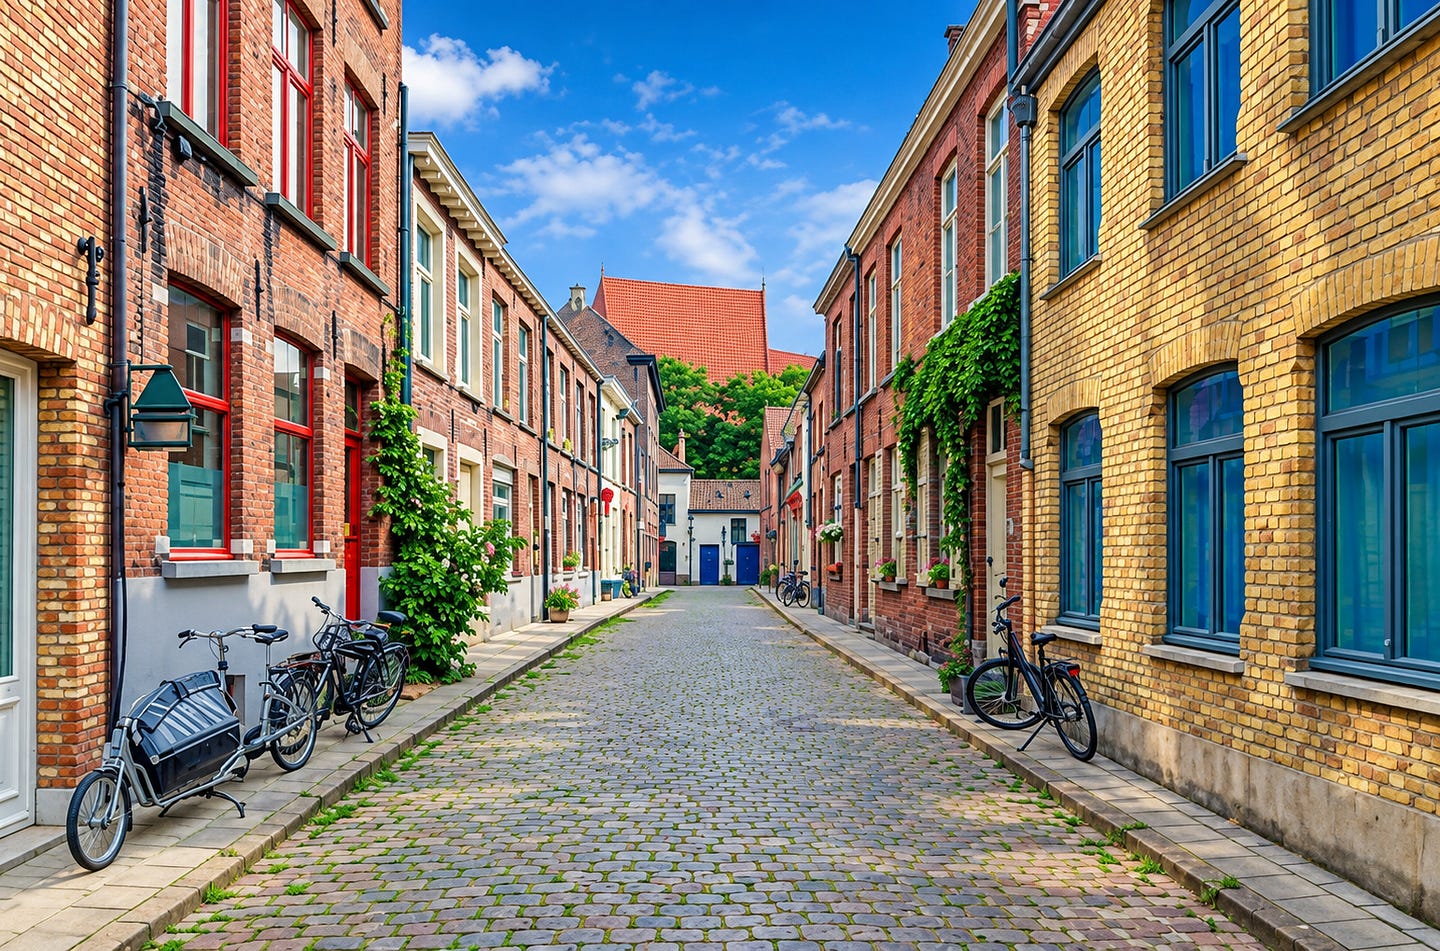
Topview has a built-in 3D scene builder where you can upload an image and tell the agent to build a low-fidelity 3D version of it. Make sure to select GPT-6 Astra as the language model before submitting your request.
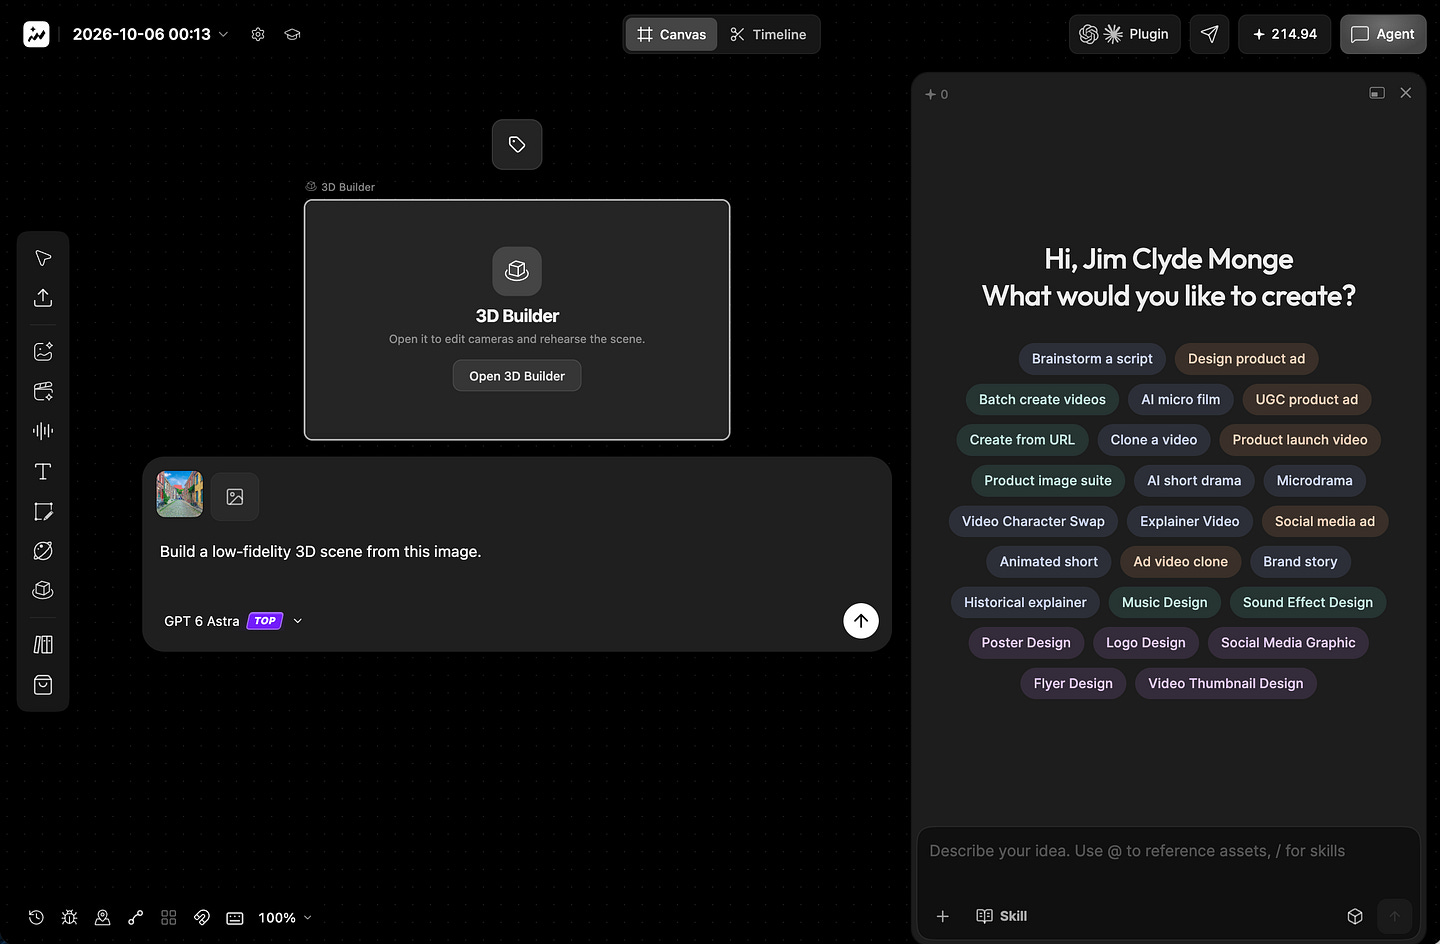
Once you submit, the agent gets to work and gradually builds the scene. You can watch each object appear in the Objects tab and preview the scene through the camera view as it takes shape.
When it finishes, your dashboard should look something like this:
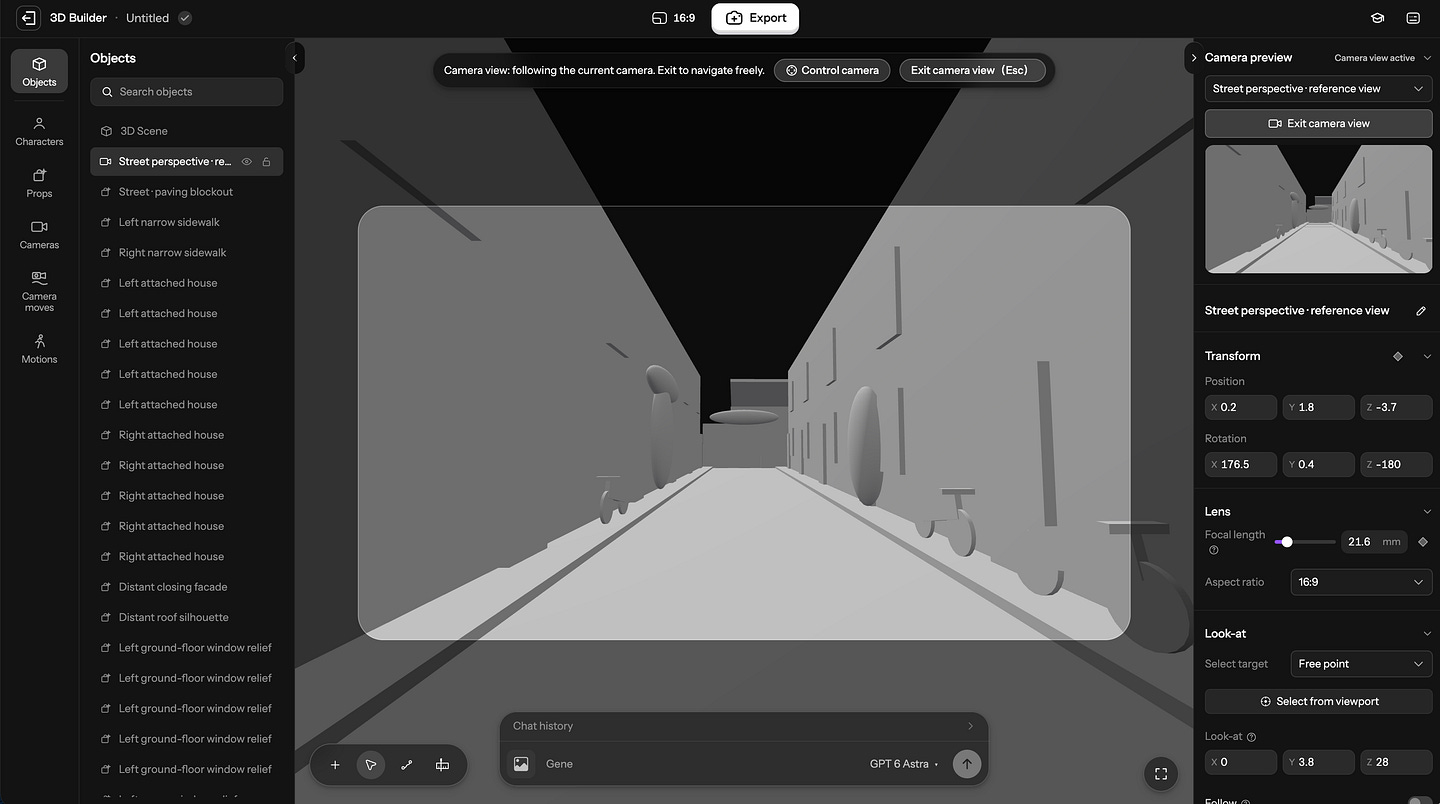
GPT-6 Astra did a good job identifying which parts of the image belonged in the 3D scene. I can see the buildings, trees, and bicycles, all represented by simple objects.
I know.. I know. This scene looks super basic, and that’s completely fine. We’re going to use it as a guide for the video generator in the next steps, so the layout matters much more than detailed textures.
You can also tweak the scene by describing changes in the prompt field. Ask the agent to add an object, remove something you don’t need, or move it to a different position.
How to Add Characters and Make Them Move
Now that we have the street, it’s time to add a character.
Topview gives you several options, including female, male, youth, and child characters. Pick one and add it to the scene.
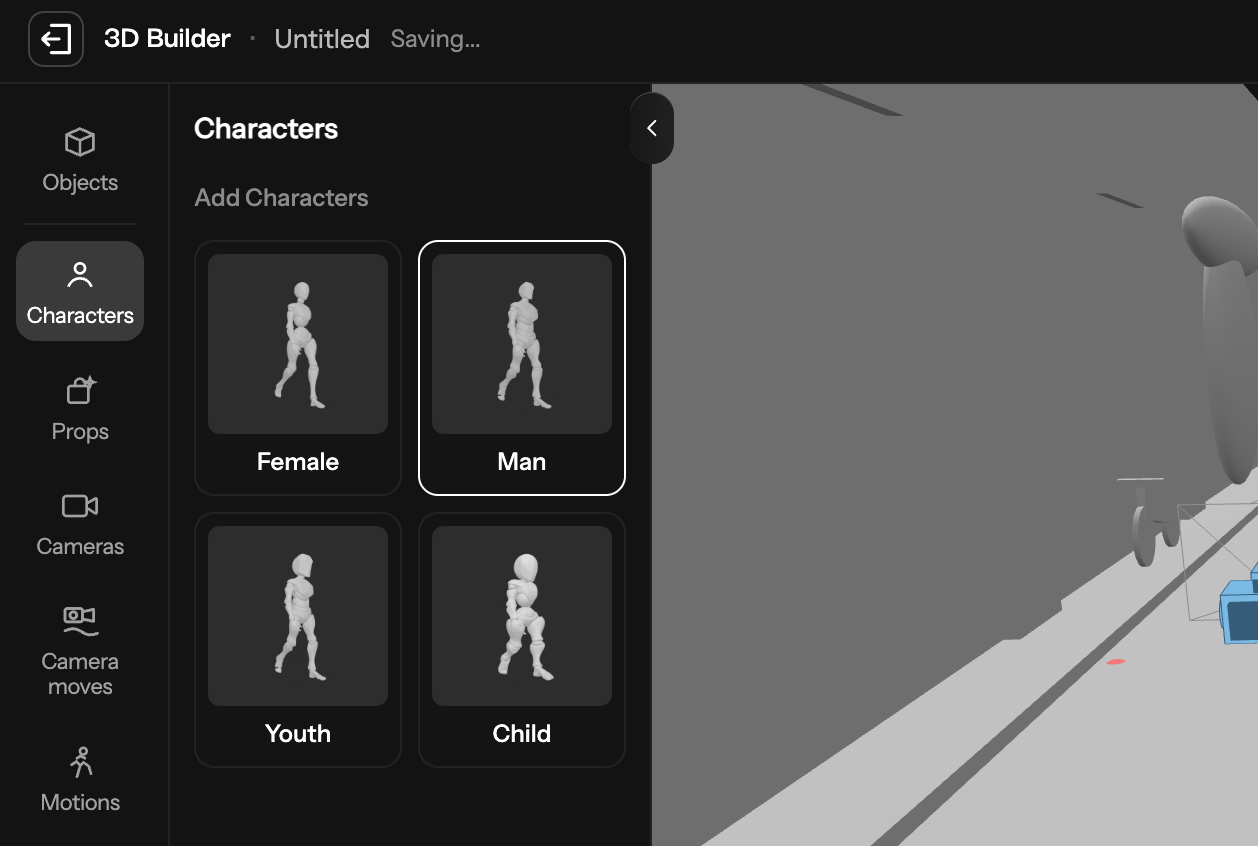
I’d love to see the engineers add more choices here. Animals, robots, or a few strange creatures would be fun to work with, especially for scenes that go beyond everyday human activities.
For this example, I chose a male character and added a walking animation. Here’s the sequence:
Select the character and set its initial pose to a walking pose.
Switch to the Timeline view and enable automatic keyframing.
Add a motion preset. I used “Walking while texting.”
Set the character’s position at point A, then move forward on the timeline and reposition him at point B. These positions define where he walks.
Click the play button to preview the animation.
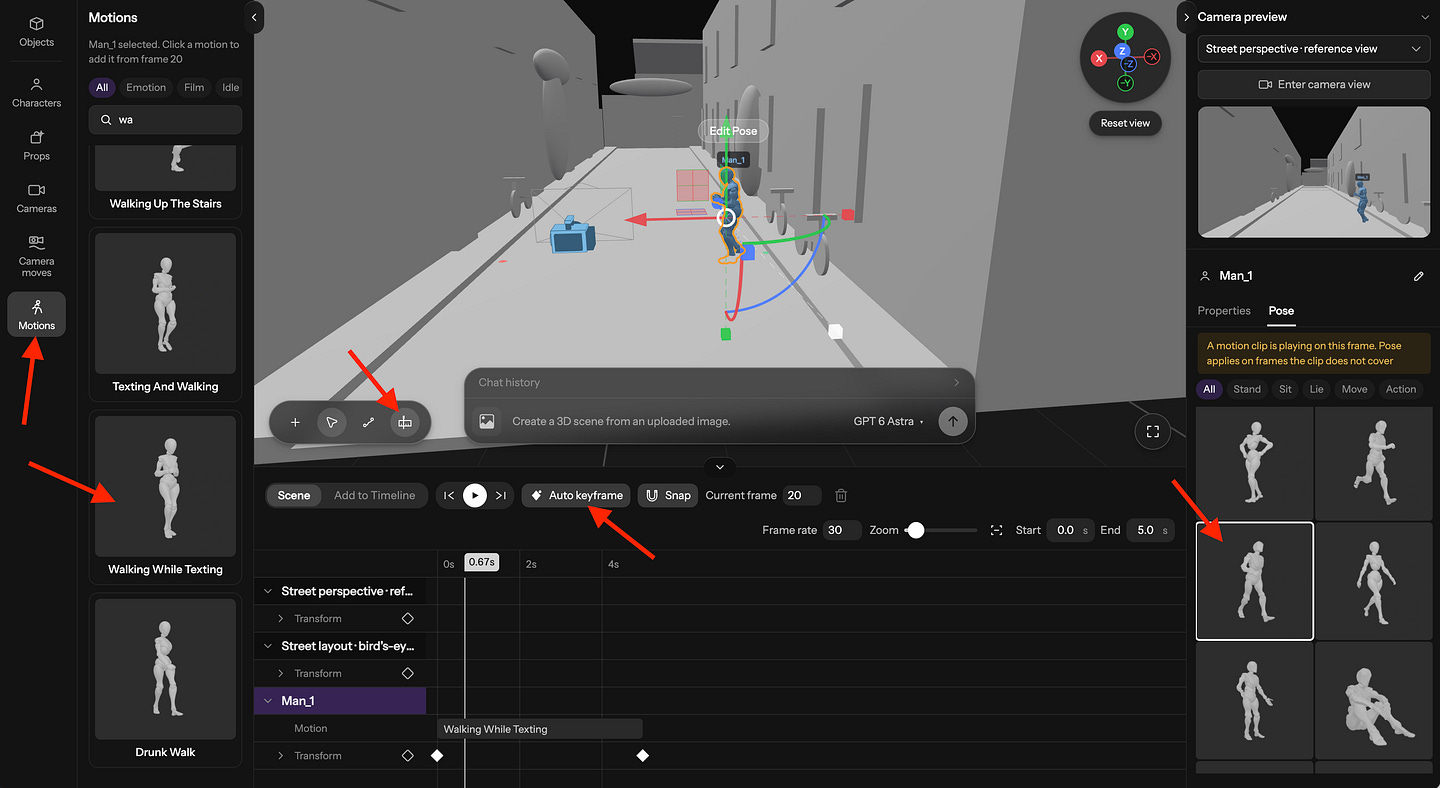
Preview the animation before exporting it. You’ll want to see whether the character walks where you intended and whether the camera keeps him in frame.
Once you’re happy with it, click Export and download the video. I used a 16:9 aspect ratio for this demo.
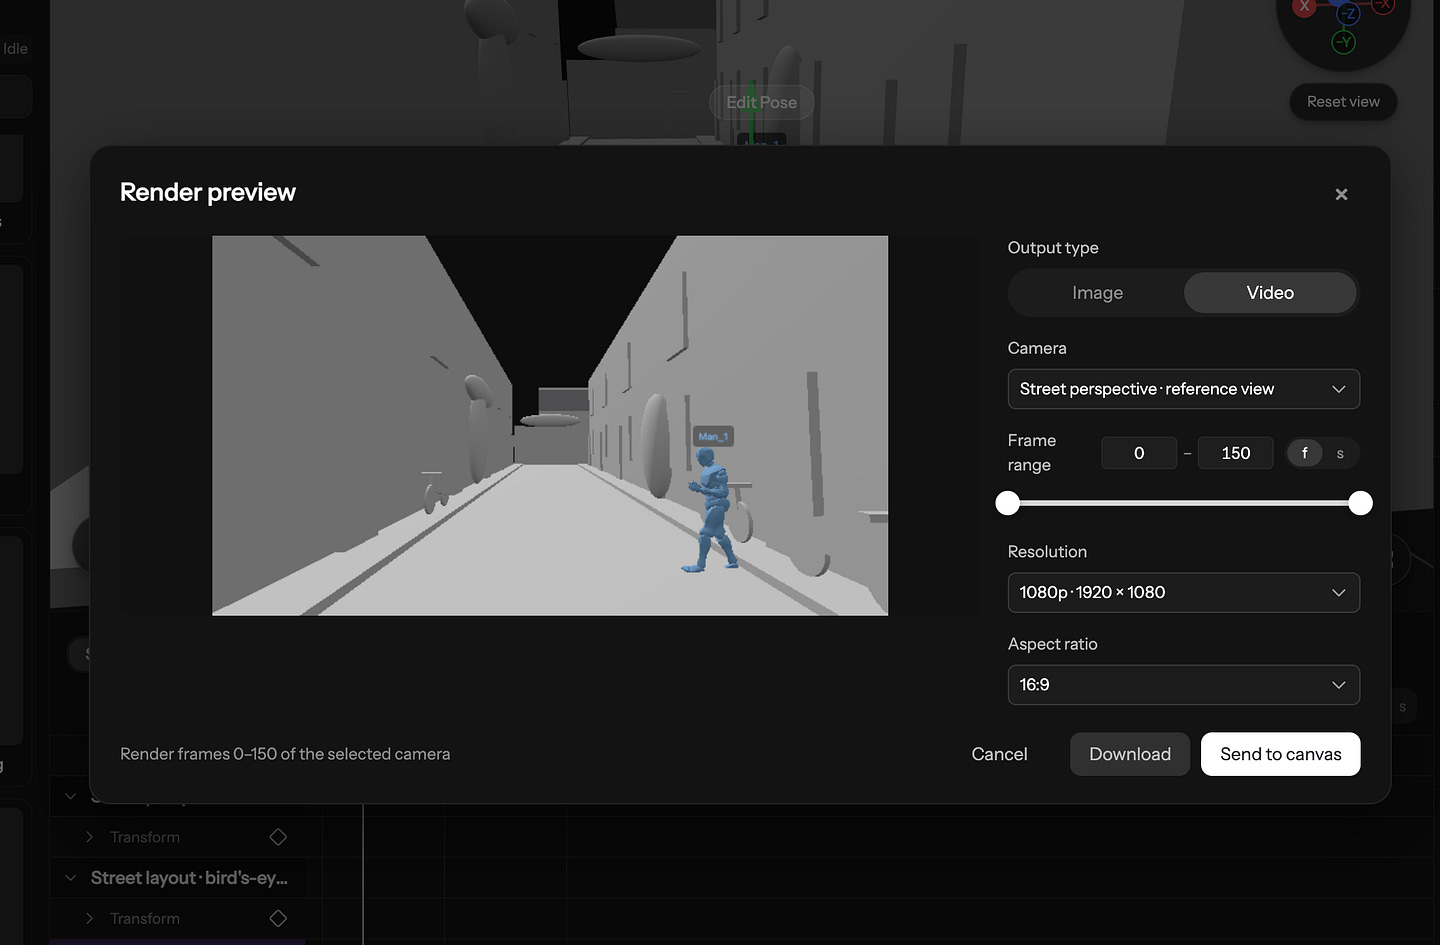
Here’s what the 3D animation looks like:
Pretty cool, right? The character now walks down the street while looking at his phone. Even with the simple models, you can already see the action we want in the final video.
Keep this animation in the workflow after downloading it. Click “Send to canvas,” then return to the Canvas view so we can use it for video generation.
Generate the Final Video From the 3D Reference
In Canvas, you should now see the reference video in the workspace. Select it and choose the option to generate a video.
In the prompt box, describe how you want the final output to look. For this example, I used:
Prompt: A man walks down a lively street while texting on his phone. Colorful apartment buildings, green bushes, and parked bicycles line the sidewalk.
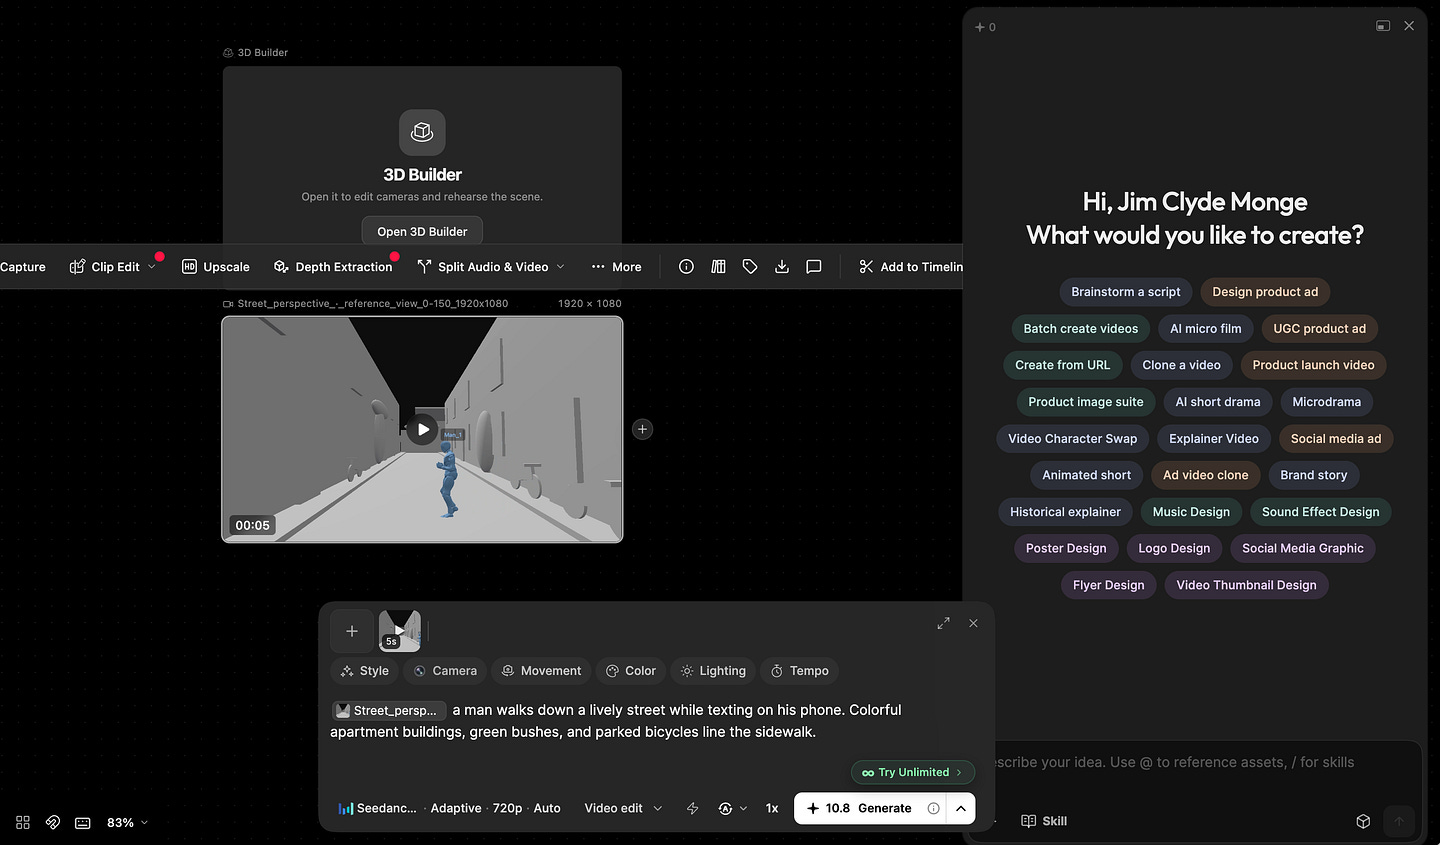
I used Seedance 2.5 for this step. Astra built the scene, and Seedance used the reference animation and prompt to generate the finished video.
The result appears beside the reference video, so you can compare them directly.
Take a look at the first frame of both videos below. I love how Seedance 2.5 captured the kind of scene I had in mind: colorful apartments, bushes, and bicycles along the sidewalk.
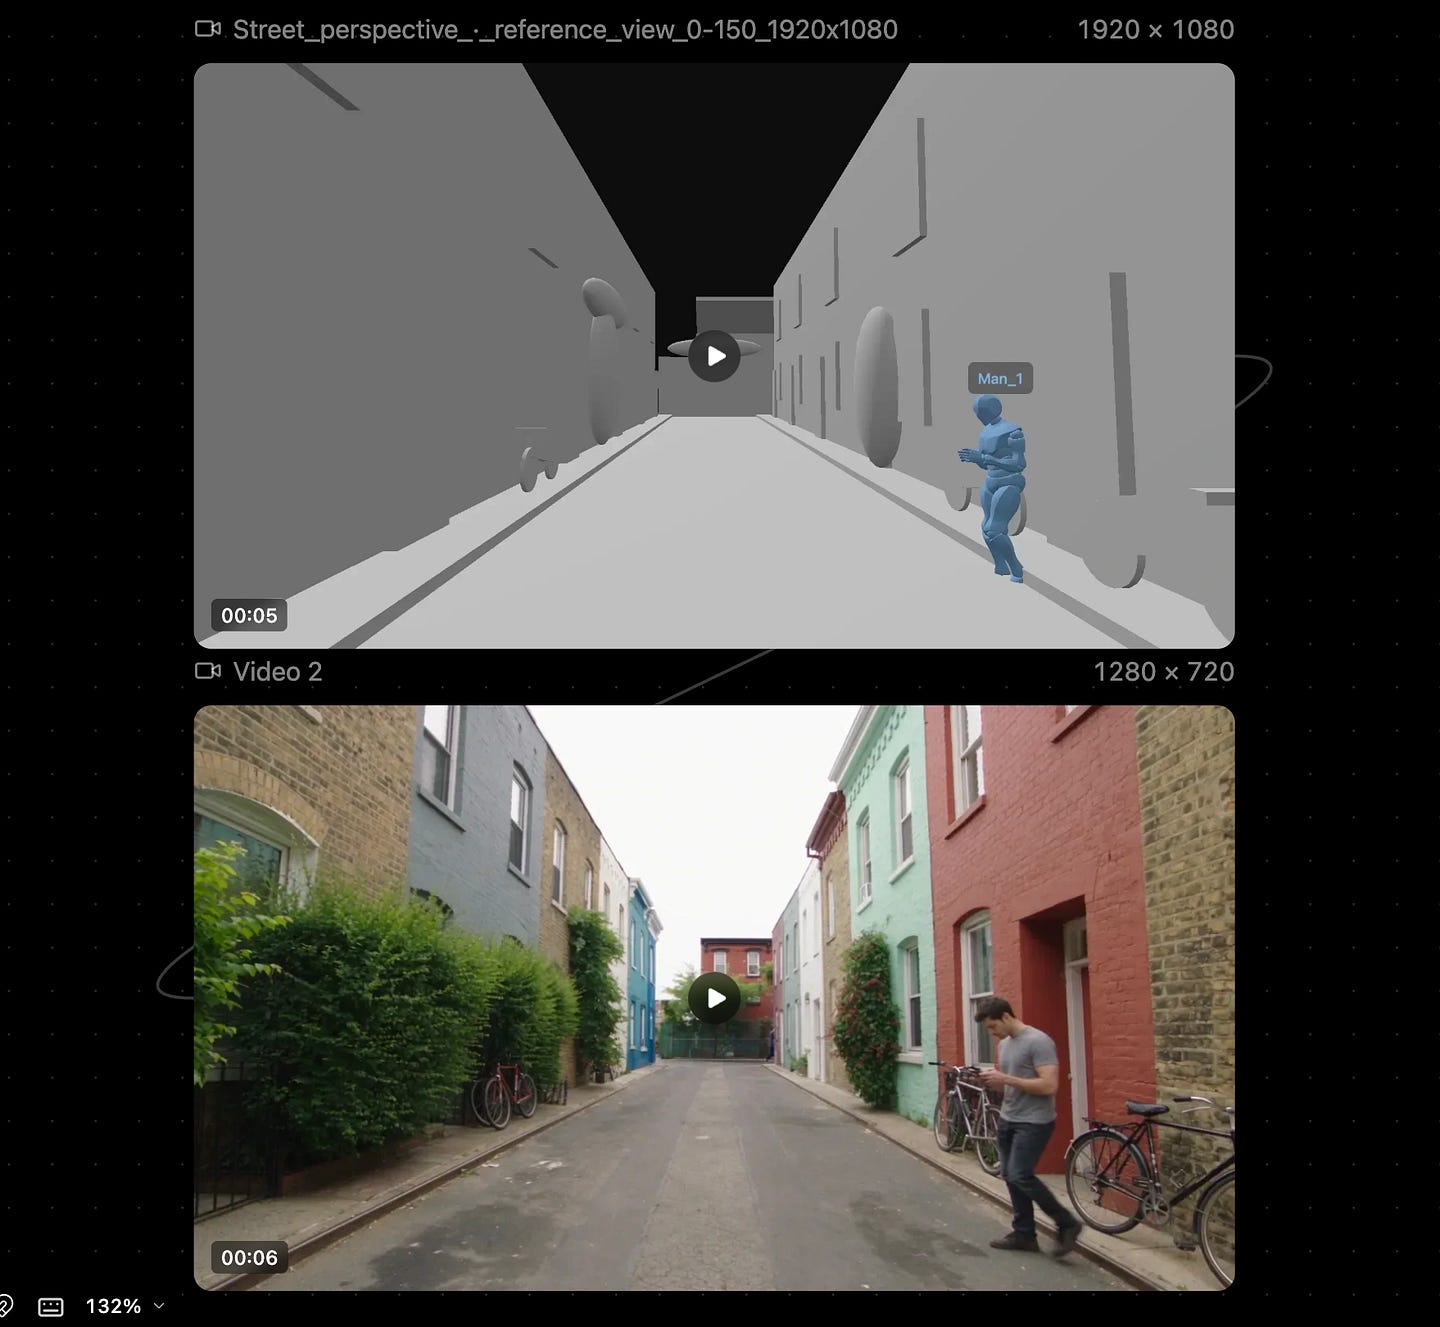
The rough 3D scene gave Seedance a layout to follow. I could show it where the character belonged and what surrounded him, then use the prompt to describe the finished appearance.
Here’s the final output:
Awesome. I’m happy with how this turned out, especially considering how simple the reference animation was.
Remember, this is only a basic example. You can build more complex scenes with additional subjects and props, then try different camera movements.
A Few More Takeaways
Rehearse the Scene Before Generating
The 3D preview lets you watch the shot before committing to the final generation. You can inspect the set, move objects, and check the camera movement while the scene is still easy to change.
A character walking behind a tree is something you can catch during that rehearsal. Fixing the tree’s position there can save you from discovering the same problem in a paid video generation.
Everything on Set Is Adjustable
Camera position, camera angle, camera animation, object placement, visibility, timing, and scene layout are all things you can refine before generating.
I like having that level of control because describing a camera angle in words can get frustrating. In the builder, you can move the camera and look at the frame yourself.
Topview’s scene and camera controls also let you explore multiple angles of the same setup. The video model can still interpret details differently, but you’ve given it a much clearer starting point.
Build Scenes With Models Like GPT-6 Astra or Opus 5.5
GPT-6 Astra can help turn a description or reference image into a controllable 3D scene. Opus 5.5 is another model option for this workflow.
For my street example, Astra picked out the main objects from the image without me having to list every building, tree, and bicycle. Once that first version was ready, I could focus on the character and animation.
You can continue giving the agent instructions as you work. That makes it easier to try a change without having to rebuild the scene yourself.
A Few Video Generation Tips
I have spent a couple of hours exploring the workflow, and here are a few helpful things to remember:
Start with one sentence or image: Let the agent build the scene, then adjust it. One character and one action are enough to get familiar with the controls.
Watch the generation cost: Scenes start at $0.10 with Qwen 3.8 Flash. Other models have different rates. Building a scene manually doesn’t deduct scene-generation credits, while final video generation costs extra.
Match your prompt to the reference: If the character walks while texting in your animation, describe that same action in the prompt. Add details about how you want the finished video to look.
Reuse the set: Move the camera to try different angles without rebuilding the scene. This is useful for ads and stories with multiple shots.
Play through the 3D preview before generating. It’s easier to fix an awkward angle or misplaced object while you can still move it yourself.
Final Thoughts
Video models have gotten a lot better at following prompts, but I still love seeing people come up with clever workflows like this. Sometimes the model just doesn’t get what we mean, no matter how many times we rewrite the prompt.
Being able to move things around, play the animation, and say “this is what I want” makes so much sense.
GPT-6 Astra continues to amaze me too. It understood the street image well enough to pick out the buildings, trees, and bikes and put them into a 3D scene. I’ve also been using it a lot for coding and data analysis, and I’ve been having a great time with it.
Topview makes these experiments easy to try, so thanks to the team for putting this together. The UI is intuitive, and the UX is really simple and good. You don’t need to learn a whole 3D modeling tool just to make a guy walk down a street while texting.
That’s about it. I encourage you to try this new workflow on Topview. Let me know what you think in the comments!
Hi there! Thanks for making it to the end of this post! If you enjoyed this content and would like to support my work, consider becoming a paid subscriber. Your support means a lot!