Create Realistic UGC Video Ads for Your Product with Flux Labs AI
Here's a step-by-step guide on how to create a video ad of an influencer that's promoting your own products with Flux Labs AI.
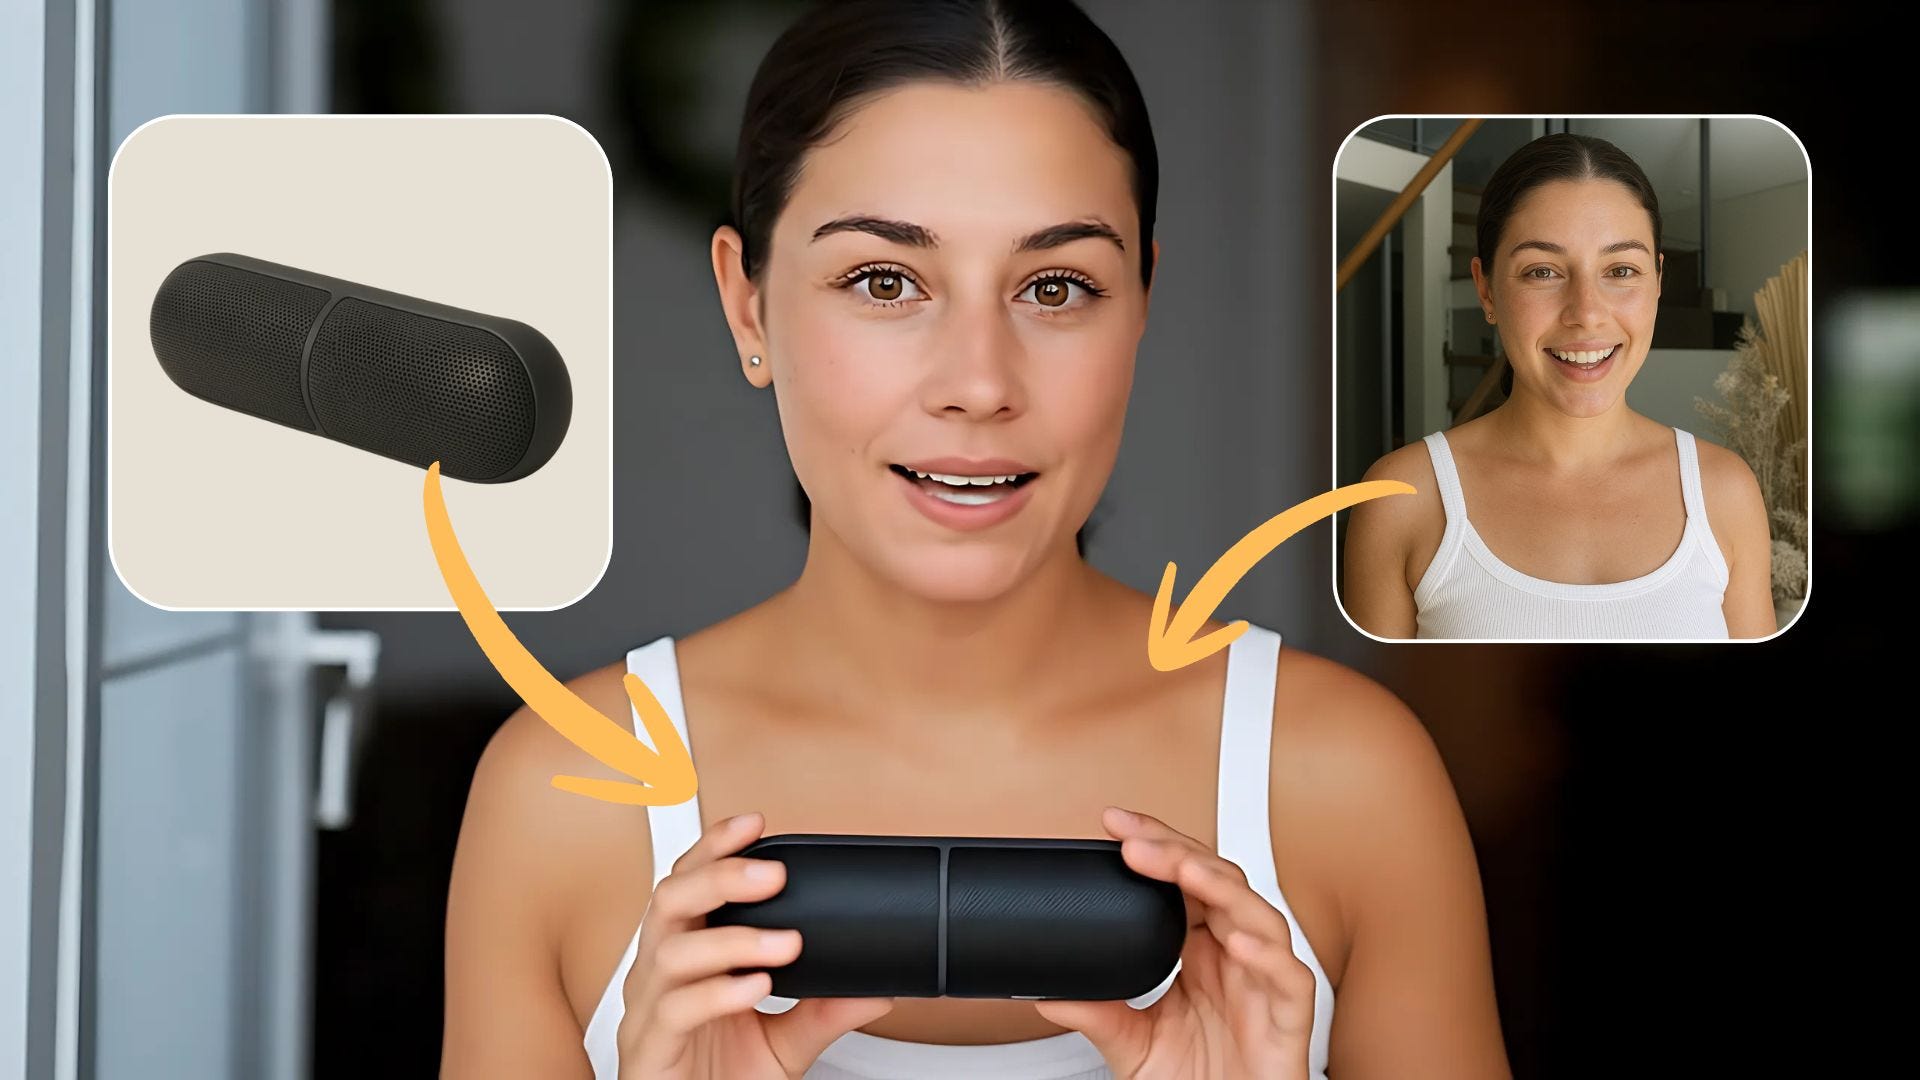
Flux Labs AI just got a brand new trick that I think a lot of marketers, business owners, and even casual creators will find useful. It now lets a virtual influencer hold your products and promote them with a custom script.
Traditionally, creating user-generated content or UGC has always been a time-consuming process. Marketers, business owners, and influencers know this. You would normally search for influencers on social media, negotiate a deal, ship them the product, and wait for the promo video to come back for review. That process often takes weeks and costs hundreds of dollars.
Today, everything can be automated with the help of AI. You can make UGC videos in just a few minutes instead of weeks. You can also do unlimited reshoots with any influencer you want.
In this article, I will walk you through the process of making UGC videos with Flux Labs AI.
Let’s get started.
Creating UGC Videos
To get started, head over to Flux Labs AI and create an account for free.
Once you’re signed in, you’ll find the UGC Creator tool under the AI Tools dropdown. You can also scroll down the features list until you see the “Create UGC Video” button.

This will redirect you to the UGC video creation dashboard.

Let’s talk about the user interface for a moment. There are four main sections that represent the steps in creating your video:
Upload a product photo: This is where you upload a photo of the product that you wish to feature in the final video. For testing, you can choose from a set of example images below.
Choose an influencer: There are currently over 50 virtual influencers to choose from. You can also upload your own. More details about this later.
Describe the video: This is where you describe what the final video should look like and how the influencer behaves.
Add a narration: The final result is a talking influencer to help promote your brand or product. Write the script in this section.
You don’t always have to upload a product photo. If your concept doesn’t need one, just tick the “No need for a product photo” checkbox, and it will skip that step entirely.
Now let’s get into the details of each step.
Step #1: Adding a Product Photo
When uploading an image of a product, make sure that the image is high-quality, has no unwanted artifacts, and as much as possible with a plain background.
For this walkthrough, I’ll be using a photo of a luxury handbag. Here’s what the input image looks like:

Once uploaded, you’ll see a small settings icon in the lower right corner of the image. Clicking it opens a modal where you can tweak prompt instructions for how the product should appear in the video.
Default prompt: Show the product clearly in the video with good lighting

And yes, like I mentioned earlier, you can skip this step entirely if you want to make a talking influencer video without showing a product.
Step #2: Choosing an AI Influencer
In this step, you can either upload a portrait of your own virtual influencer or choose one from Flux Labs AI’s library. If you’re uploading your own, make sure the photo is clear, well-lit, and only has one subject.
If you need an AI-generated trial image, check out the Image Generator feature to create one.

When you click “Show more AI influencers,” you’ll see a wide selection of high-quality, AI-generated faces.

These aren’t real people, so there are no privacy concerns, and you can use them commercially without extra licensing headaches.
Step #3: Describe the Video
This is your creative brief to the AI. The more descriptive you are, the better the output. For my handbag example, I went with:
Description: A person showing a handbag to the camera for a ugc video. She excitedly shares the good things about it with her audience

Don’t be afraid to add small details like mood, camera angles, or interaction style. I’ve noticed that even minor tweaks in the prompt can completely change the feel of the video.
Step #4: Add a Script for Narration
This is where you give your influencer a voice. For example, if I wanted her to promote the handbag in a casual, friendly tone, I’d write something like:
Script: Hey guys, I just got this brand new handbag that’s super cute, high-quality, and cheap. Don’t miss it. Check out the link in my bio!

Click “Choose voice” to browse through the voice options. Pick one that matches the influencer’s look and age.

For this example, I went with a middle-aged female voice named Melody.
Step #5: Set the Duration and Video Model
This is the final step in generating the UGC video. You need to set the duration and the video model to use. The video length depends on the selected model.
Kling models support either 5 or 10-second videos
Google Veo 3 models support 8-second videos

Also, note that the credits required depend on the selected video model.
Kling 1.6 Standard: Basic quality and consumes 50 credits for a 5-second video or 100 credits for a 10-second video.
Kling 1.6 Pro: Produces a higher quality output and requires 25 more credits on top of the Kling 1.6 Standard.
Kling 2.0 Master: This is the best Kling model so far and requires 50 more credits on top of the Kling 1.6 Standard.
Google Veo 3: This is a flagship video model from Google and consumes 80 credits for an 8-second video.
Google Veo 3 Fast: This is a cheaper version of Veo 3 and only requires 50 credits for every 8-second video.
One important thing: Veo 3 only makes landscape videos. If your product image is portrait format, the AI will automatically extend the sides to fit the 16:9 aspect ratio.
When you switch models, you’ll see this warning message:

Google Veo 3 outputs landscape videos (16:9). Portrait images (9:16) will be converted to landscape; we will center the subject and extend side spaces to avoid cropping. Continue?
This is what the UGC creator dashboard looks like with all the required parameters already set:

All I have to do now is click on the Generate button and let the system do its work. In less than half a minute, the final UGC video was ready to view.
Here’s what the output looks like:
I don’t know if you’ll agree with me, but this UGC video came out super impressive. The handbag looks exactly like the input image — no weird distortions, no missing details. The influencer’s gesture feels natural, almost like she was actually holding the real product in her hands. The lip movements are in perfect sync with the script, which is one of those subtle details that make a huge difference in how believable the video feels.
And keep in mind, this example was created using the cheaper Veo 3 model, not even the flagship option. That’s worth pointing out because it means even on a lower credit cost, you can still get something that looks good enough for commercial or even professional use.
For the second example, I wanted to push things further. This time, I paired a perfume product with a male influencer and switched to the flagship Veo 3 model to see if the quality bump was worth the extra credits.

Here’s the final result:
Perfect. Even though I didn’t provide a custom script for this one, the AI automatically added a voice narration that suited the product perfectly. The visual quality was also noticeably sharper compared to the cheaper model. This is the kind of output I could confidently upload directly to YouTube or embed in an e-commerce product page without any post-editing.
In fact, I can see how brands could churn out seasonal or limited-edition product ads in bulk using just this setup.
Now, for the third and final test, I wanted to try a vertical format video aimed at TikTok or Instagram Reels. This time, I used a sunscreen product, paired it with a middle-aged female influencer, and selected the Kling 2.0 Master model to see how it handled short-form social media content.

Video description: a user holding a sunscreen product and talking in front of a camera. ugc style video for TikTok.
Script: Oh wow. This sunscreen is amazing. you guys have to check it out. I love it so much I use it every single day.
Here’s the final result:
Cool. The video looks decent, but in terms of visual quality, product consistency, and lip syncing, Veo 3 performed better. I hope that Google supports vertical videos soon so Flux Labs AI can use them for social media purposes.
How Much Does It Cost
Flux Labs AI gives you 10 free credits on sign-up. However, the free credits are only good for image generation and not for UGC video creation.
To start creating UGC videos, Flux Labs AI offers three paid tiers:

Pro costs $9.99 per month and includes 200 credits, one custom model, up to 4 UGC videos, and a mix of basic to ultra HD images.
Premium is $19.99 per month with 500 credits, three custom models, up to 10 UGC videos, and higher image generation limits.
Enterprise is $49.99 per month with 1,500 credits, five custom models, up to thirty UGC videos, and the largest image allotment.
All plans include commercial use rights.
There’s also an option to buy a one-time purchase credit that is good for a 1-month use. See the pricing page for more details.
Final Thoughts
Flux Labs AI’s UGC video generator is one of the most effective tools I have tried for creating promo ads. It uses some of the most advanced image, audio, and video models available today, which means the output quality is consistently high.
I also like how the interface is laid out. It is not the usual minimal or overly clean design you see in other tools, but having almost everything on one page works well. All the fields and buttons you need are right there without having to click through multiple menus.
The results are good enough for social media content and even paid ad campaigns. For brands and online stores, it can save a huge amount of time and money on video production.
That said, tools like this are best used with intention.
AI can speed things up, but if you publish a flood of videos every day with no clear plan, your content could look spammy and even damage your audience’s trust.
Spend some time exploring the features of Flux Labs AI. It’s got an image generator, an image model trainer, and a virtual try-on tool. Experiment with different prompts. Test multiple actors. Track the performance of each variation and refine your approach based on the data.
That’s about it. If you know of other AI-powered UGC video generators worth exploring, share them in the comments.
Hi there! Thanks for making it to the end of this post! My name is Jim, and I’m an AI enthusiast passionate about exploring the latest news, guides, and insights in the world of generative AI. If you’ve enjoyed this content and would like to support my work, consider becoming a paid subscriber. Your support means a lot!